This tutorial follows on from Introducing Docker Containers to Computing Students and is part of a series. If this is your first time here, maybe start at the beginning.
The very first time you login to https://docker.comp.dkit.ie your will not see much. This is because like https://xoa.comp.dkit.ie, you need to request permissions to use the features of this service. Either ask your lecturer or drop into P1155 to get added to the correct group.
The second time you login, with permissions now hopefully in place, you will see the default portainer dashboard.
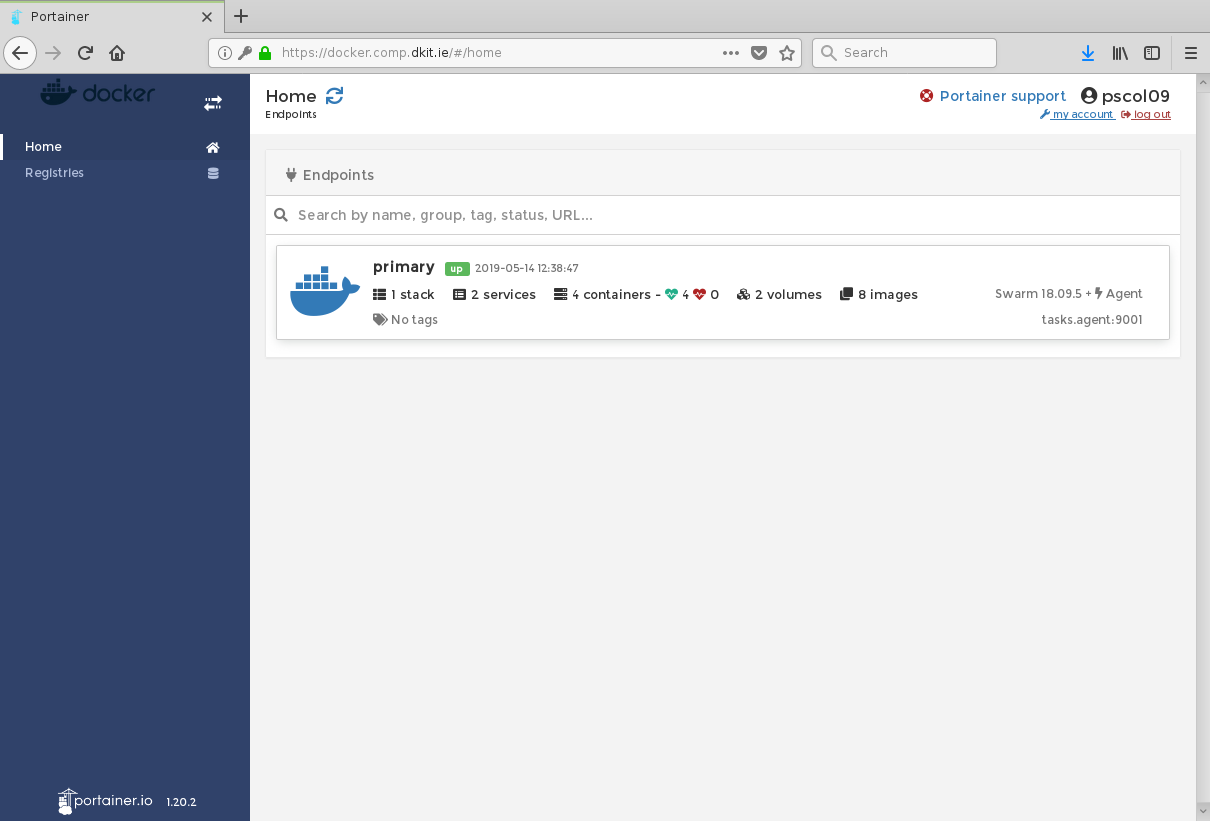
You will need to select the “Primary” endpoint to expand the menu of options available to you for this Docker stack.
It’s tempting to jump right in and start firing up containers, but you immediately run into issues as you need to do other things first… so place bear with us!
The first thing we need to do is create a private network for our containers to sit on. In general, Docker takes care of the networking aspects so that the containers can communicate with other containers and also with the Docker Host.
Out of the box, Docker creates three networks:
- bridge – An automatically generated network with a subnet and a gateway.
- host – Allows a container to attach to the host’s network.
- none – A container-specific network stack that lacks a network interface.
Docker connects to the bridge network by default; this allows deployed containers to be seen on the DkIT network, but does not allow containers to see each other – which might become an issue later on (for example, imagine wanting your NGINX instance to connect to a MySQL instance over port 3306 in order to deploy WordPress).
So what we need to do is create our own, private network that only our containers will/can use and that only we, as the user, can see, modify and delete via the dashboard. We only need to do this once, so let’s do it now before we start writing images and firing up containers all over the place!
Click Networks on the menu and then select Add Network

The trick now is to give your network an entirely unique name (we recommend incorporating your student number, and keeping things lowercase for simplicity/consistency eg. “d001234_network”), NOT filling in the IP address details (this will let them be decided by Docker… trust us, this is a good idea) and ensuring your network can be attached to containers you create in the future (very important).
Most important of all though, is the network driver you choose. If you want your containers to be able to communicate, you MUST choose “overlay”.
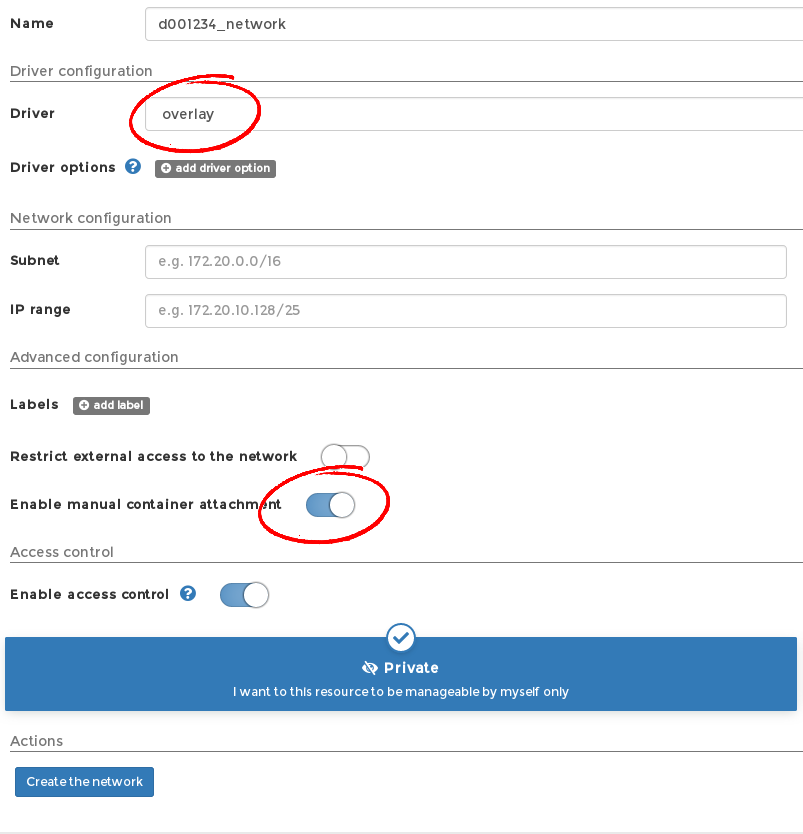
When you are happy, click Create the network. This will result in something like this:
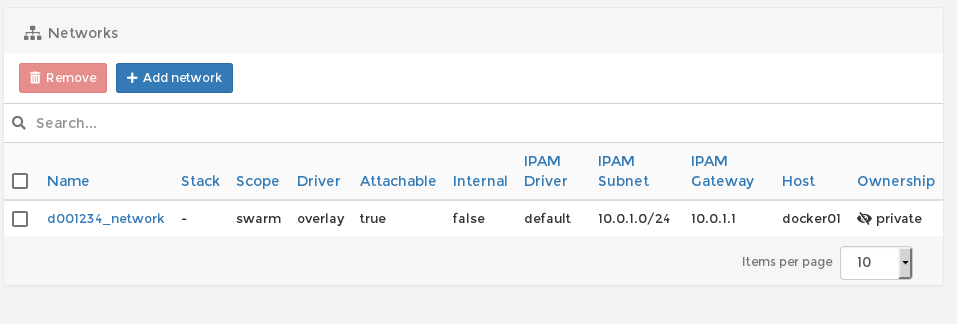
This is exactly what we needed. Note that you can add other similar networks later if you want (maybe for separate projects) or can create networks using the bridge or host network drivers, depending on your needs. You can even share a network with other students for a group project if you alter the restrictions.
We are now ready to proceed to Building an Image from a Dockerfile (and adding to the DkIT Registry).