While off the shelf storage solutions like NAS can be quite expensive, you can easily build your own storage server with some old hard disks and a disused PC (or even a Raspberry Pi) quite easily. This is great for storing your music, movies or even taking backups of your other machines over something like SAMBA.
Today we are going to look at the amazing TrueNAS software, which you can use for free to build your own NAS. We will replicate our hardware setup in XOA by creating a small Linux PC and adding extra 4 disks, each no more than 20GB in size (in the real work these could 2GB or even 2TB depending on what you can afford) so as not to waste resources on the college network.
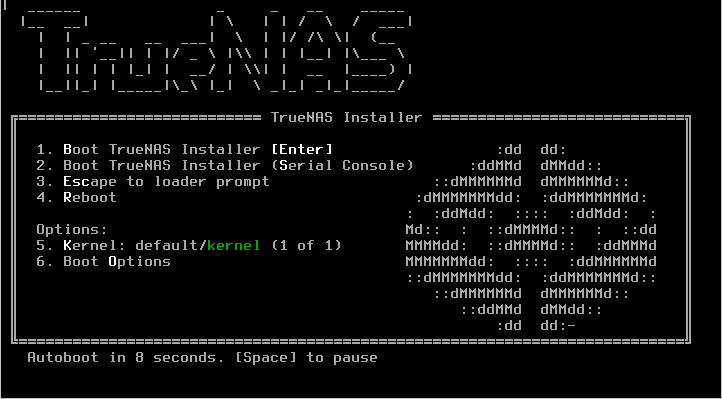
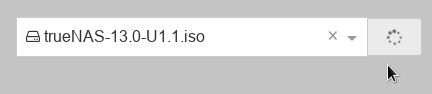
First, we create our machine like this and mount the TrueNAS iso file for installation.
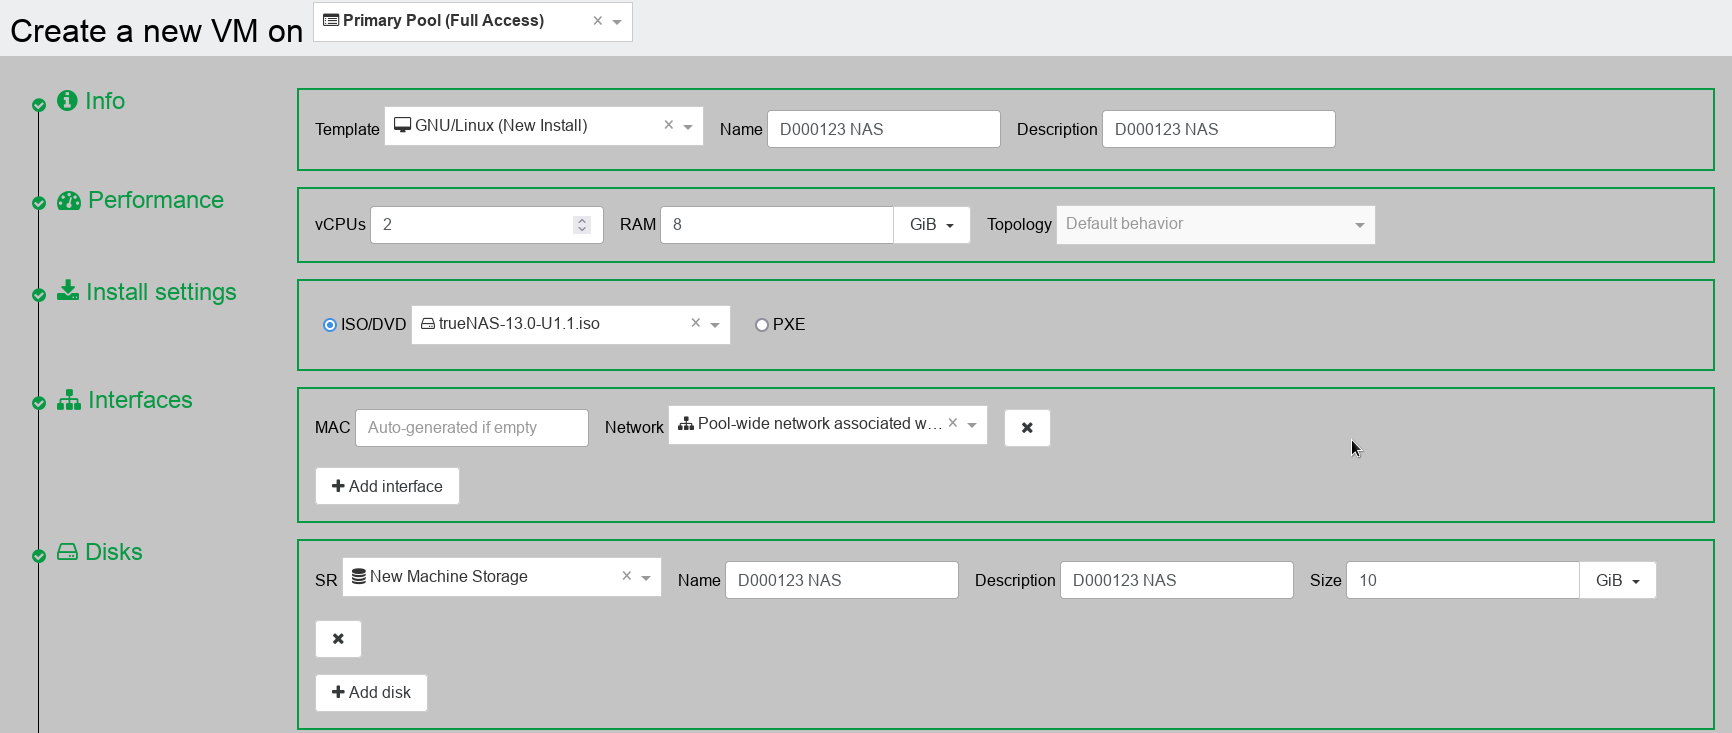
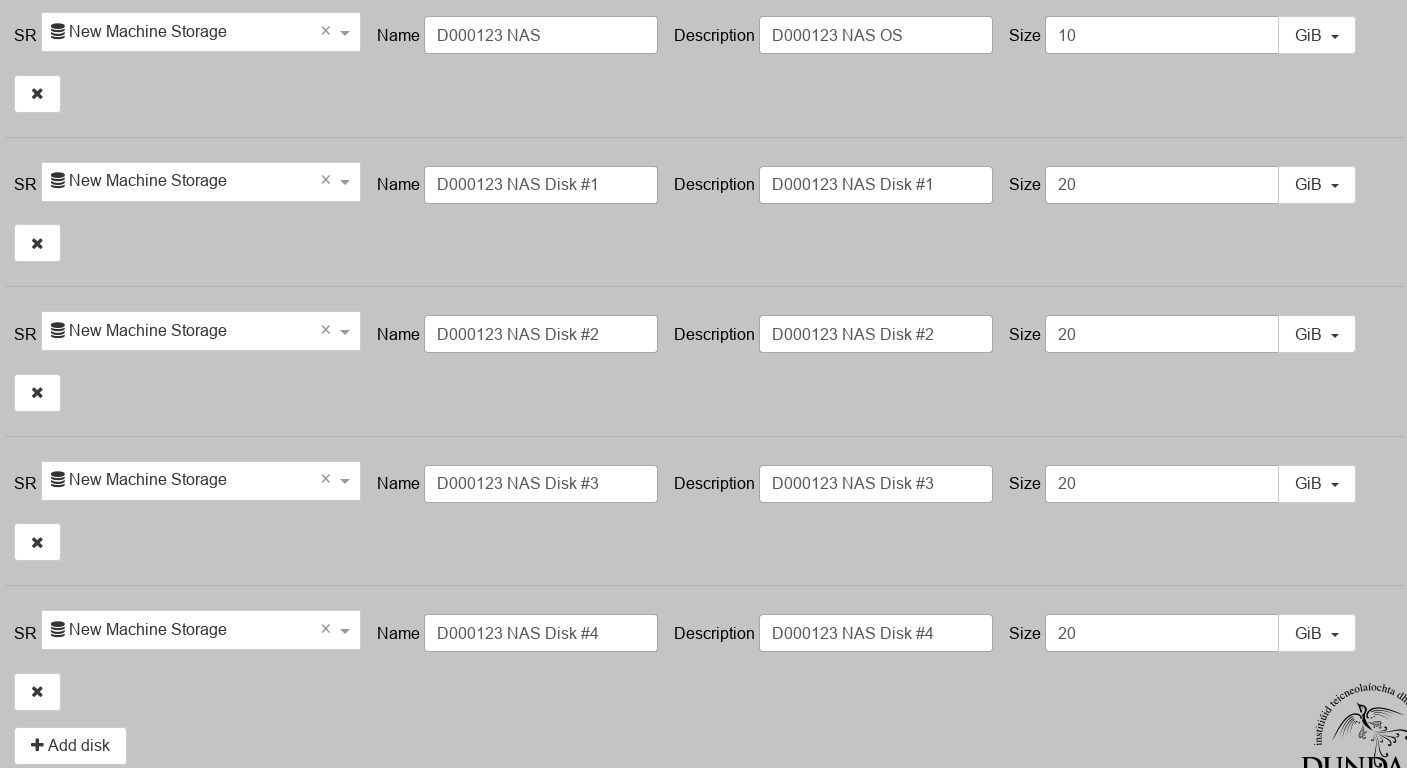
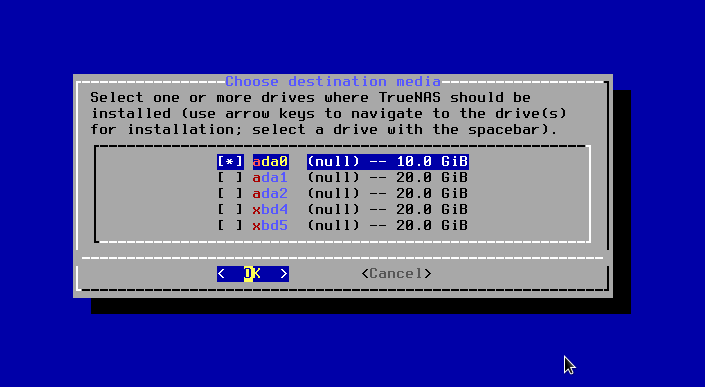
You need at least 8GB for TrueNAS to work properly. Now, let’s add our 4 additional disks and name them appropriately.
Once you are happy, go ahead and create the machine.
Install the OS to the small basic drive that came with the VM and NOT the additional disks we added. We will set those up later.
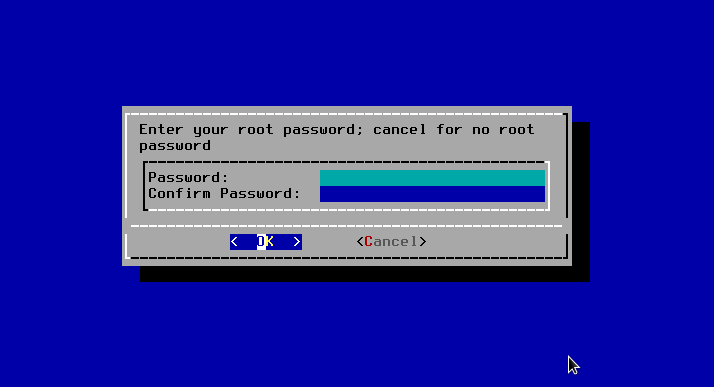
You can skip password creation for now if you like, we’ll do this later.
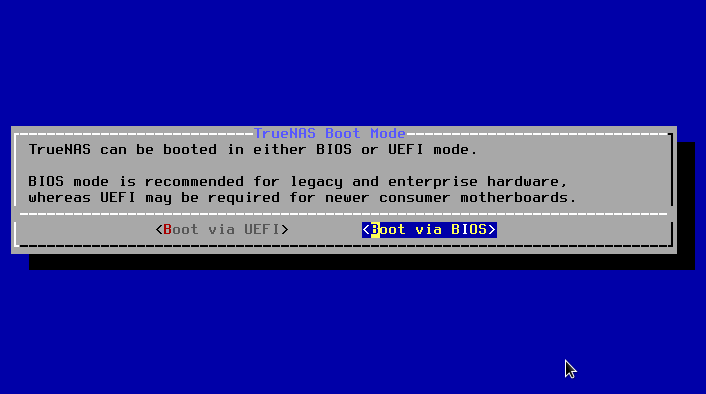
Stick with the recommended boot mode.
Installation should now be finished, you can reboot the VM…

…and eject the install media.
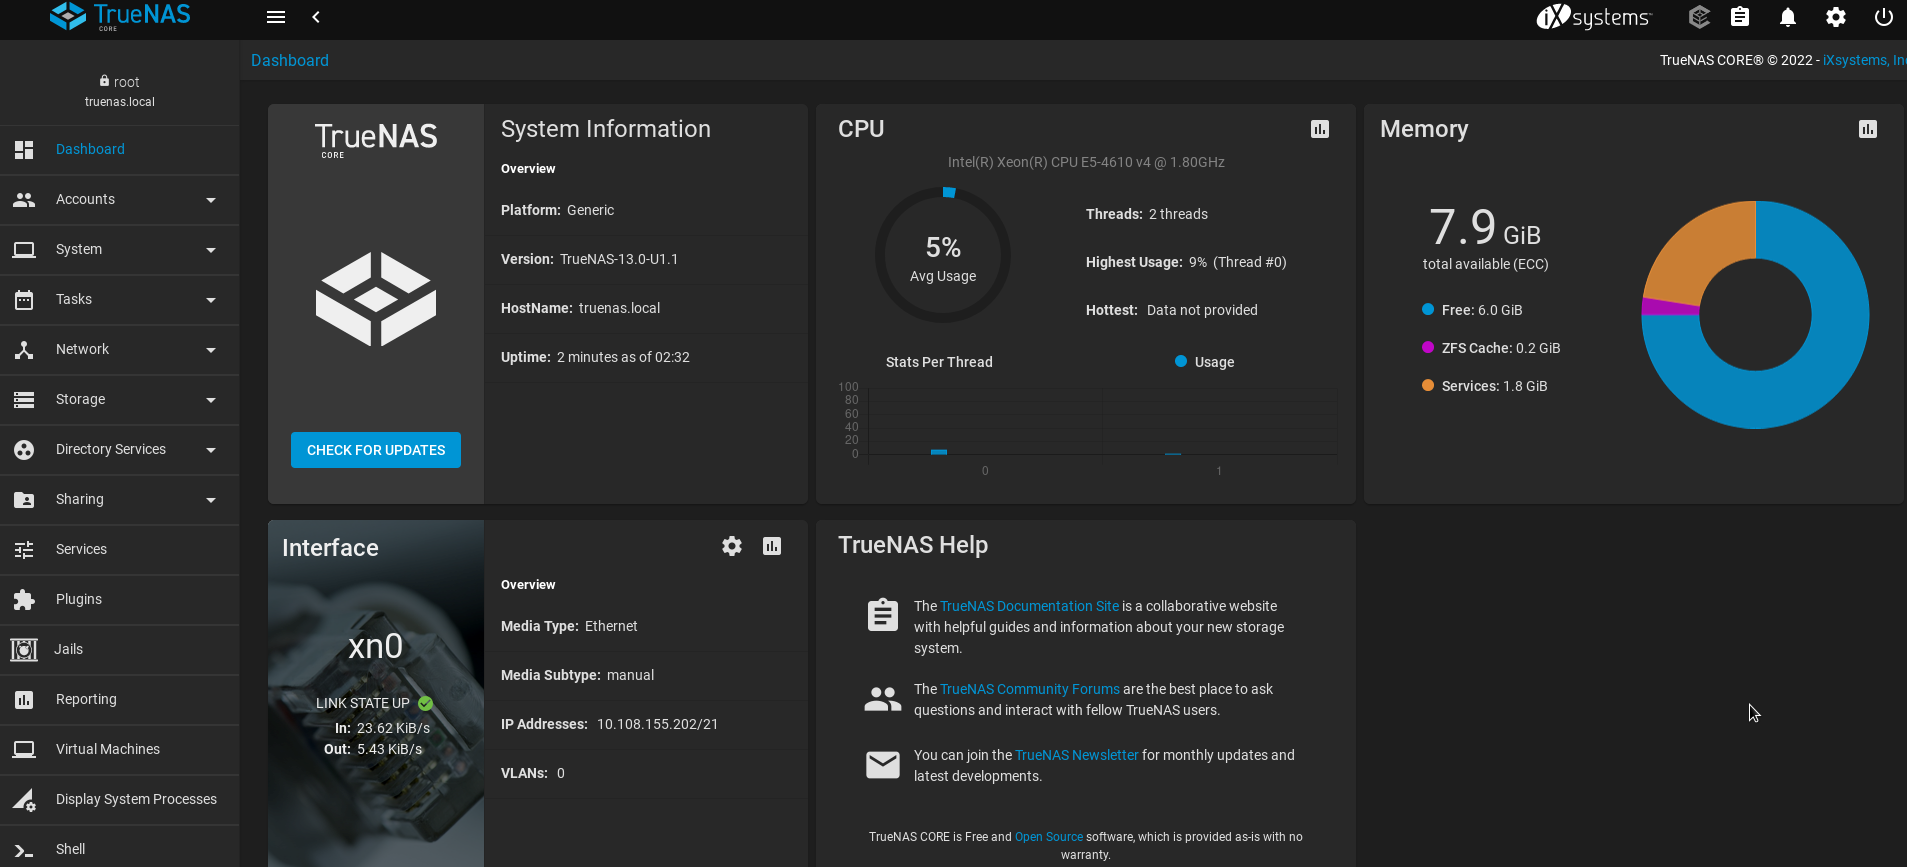
The VM should come back up and give you the Web UI address plus other options.
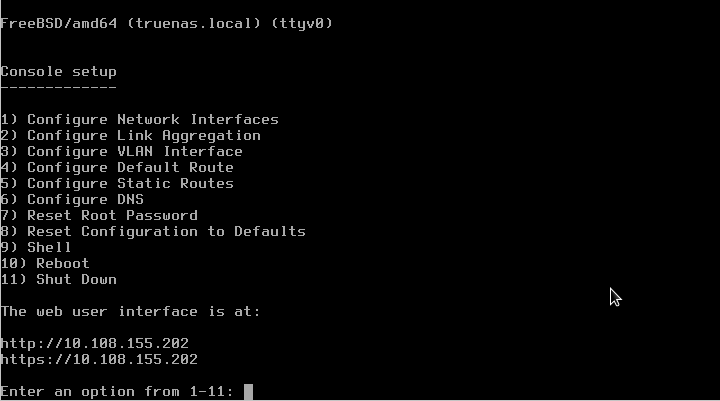
We can now take that IP address and finish setup in our browser.
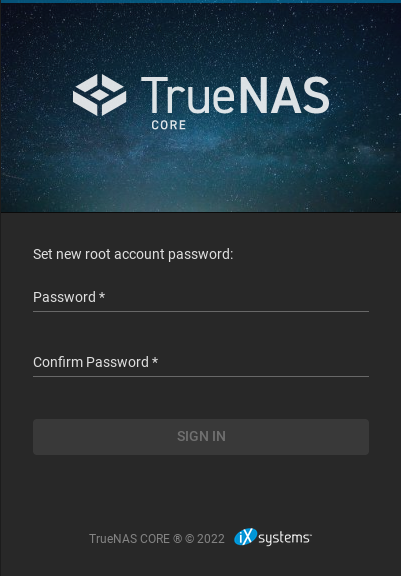
At this point we have no choice but to set a password before we can access the dashboard.
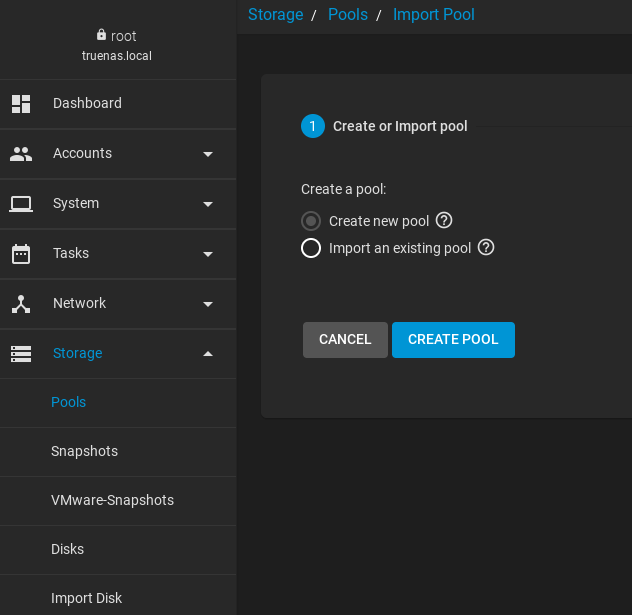
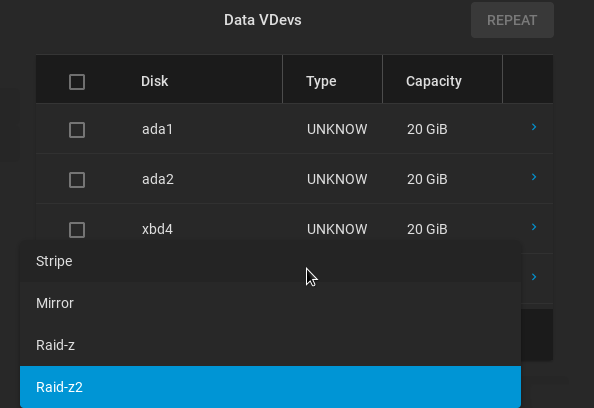
Let’s dive straight in and create our storage pool with the 4 disks from earlier.
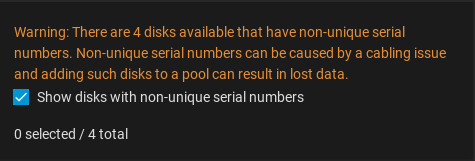
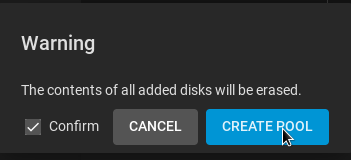
Because we are using virtual disk for this tutorial, we will need to ignore warnings about disk serial numbers. This will not happen if you are building an actual PHYSICAL server with real disks!
Once you selected all available disks (the “suggest layout” button is your friend here), you need to decide on the RAID type to balance storage and performance. The suggested layout will meet this requirement, but your own use case scenario might require something different, so let’s have a very serious chat for a moment about RAID arrays.
RAID Types (RAID0 vs RAID1 vs RAID5 vs RAID6)
Performance tends to be one of the key aspects of a smooth-running business. A RAID set up is used for raised levels of performance and data redundancy. Needless to say, a correct drive configuration is a must to achieve these goals. Storage options are getting more affordable with time, so businesses and individuals are finding that they have more RAID options to choose from.
The speed of a RAID is viable for occupations of media projects including music, editing, streaming purposes, and high definition videos. RAIDs can be the best option for businesses where large amounts of information are stored daily and hold fault tolerance as a prime aspect.
A RAID array is perfect for data reliant programs and applications. It is an affordable option for additional storage, better reliability, and superior throughput.
Some RAIDs help with high-speed applications to stream information.
Despite its safety measures, businesses are still advised to have a complete backup. A RAID doesn’t protect against external factors like operator negligence, theft, software issues, malware, etc. Data recovery services can help you with this.
RAID levels like RAID 0 and RAID 1, are used more often by consumers and small enterprises. RAID 5 and RAID 6 are among the alternatives RAID levels that are hardly put into implementation these days, but still have their uses.
RAID-Z is a non-standard version of RAID that uses the ZFS file system; no other file system can be used for this array.
The ZFS file system uses an additional level of checksums to search for data corruption without displaying the appropriate messages. ZFS uses checksums with any level of redundancy, including single disk pools. The distribution mechanism is similar to RAID 5, but it uses dynamic bandwidth. Any block, regardless of its size, has its own RAID bandwidth, which means that each RAID-Z record is a full-band record.
In addition, this array has very high performance and speed, even better than RAID 5 in this regard.
RAID0
Stripe pools and RAID0 are almost equal to each other. Although ZFS provides checksumming to avoid silent data corruption, there is no redundant data (no parity nor a mirror) to rebuild data from in case of a disk failure. Another difference is that ZFS stores metadata records in several copies regardless of the top-level RAIDZ layout. However, user data is still stored in a single copy on a striped ZFS pool. While the configuration is not recommended to be used solely, it still can be considered as a part of redundant layouts like RAID10 (stripe plus mirror).
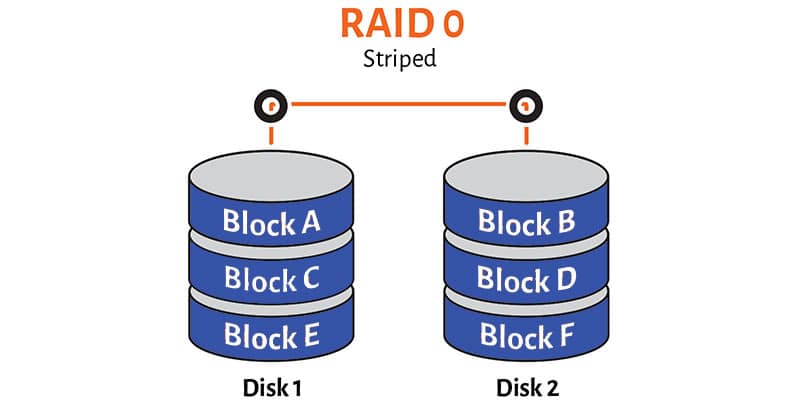
Like RAID0, a striped ZFS pool provides no fault tolerance at all. Should any of the disks in the array fail, the entire pool fails and all the data is lost.
Striped ZFS solutions are cheap, and they use all the disk capacity minus disk space used for metadata redundancy which is the must on the ZFS pool regardless of the layout.
RAID1
Requires minimum of two drives and generally is very similar to a RAID1. Using in conjunction with the ZFS filesystem gives you certain advantages like automatic checksumming. Although checksumming just allows detecting data corruption, it is still something, which most traditional RAID systems lack. Another difference from a regular RAID1 is that with the help of ZFS you can create storage systems involving multiple mirrors rather than just 2 or 3-way mirrors within the traditional RAID1 technology.
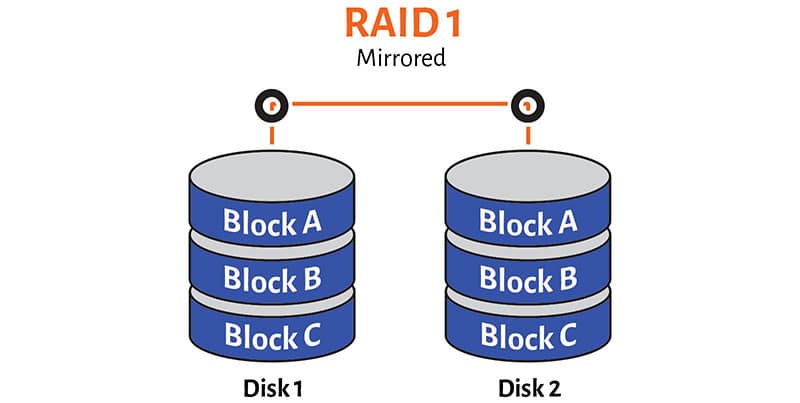
While a traditional RAID1 is recommended to use when you need a reliable storage of relatively small capacity, a mirrored ZFS pool is recommended when you need an extremly reliable storage system.
A regular RAID1 stores two identical copies of data on two hard drives and doesn’t use blocks and stripes. A mirrored ZFS pools can store as many copies of data as you wish and does use blocks and stripes: copies are stored within particular “rows”.
ZFS mirror pool uses the capacity of (N-1) drives to maintain fault tolearnce. This amounts to (N-1) \ N capacity loss for the array. For example, if you combine four 500GB drives in a ZFS mirror, you’d only get 500GB of usable disk space and 1.5 TB goes for redundancy.
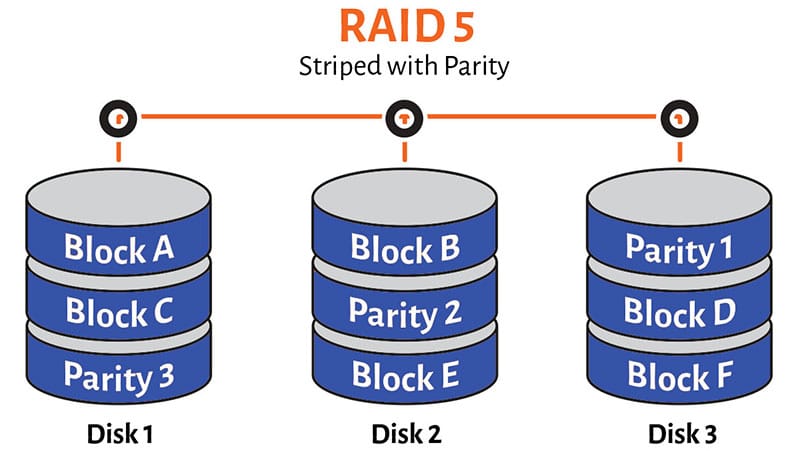
RAIDZ (RAID5)
RAIDZ fits as large, reliable, relatively cheap storage.
RAIDZ (sometimes called RAIDZ1 pointing to a single parity) is most similar to a traditional RAID5 and requires minimum of 2 disks. Like in a regular RAID5, every “row” along with the data blocks stores a parity function calculated over the data blocks, which allows a system to survive a single disk failure. The difference is in the row placement pattern which is no longer the same over the disk set; another difference is block size which can vary over the rows. Also, there are no longer distinguished right/left, synchronous/asynchronous RAID5 layouts in ZFS RAIDz pools.
If all drives are OK, read requests are distributed evenly across the drives, providing read speed similar to that of a striped pool. Theoretically, for N-disk array, a striped pool provides N times faster reads and RAIDZ should provide (N-1) times faster reads. However, the number of blocks in a particular row depends on the data block size to be written as well as on the ZFS unit block size so we can only talk about (N-1) times read speed acceleration as the top limit. If one of the drives has failed, the read speed degrades to that of a single drive, because all blocks in a row are required to serve the request.
Write speed of a RAIDZ is limited by the parity updates. For each written block, its corresponding parity block has to be read, updated, and then written back. Thus, there is no significant write speed improvement on RAIDZ, if any at all.
The capacity of one member drive is used to maintain fault tolerance. For example, if you have 10 drives 1TB each, the resulting RAIDZ capacity would be 9TB.
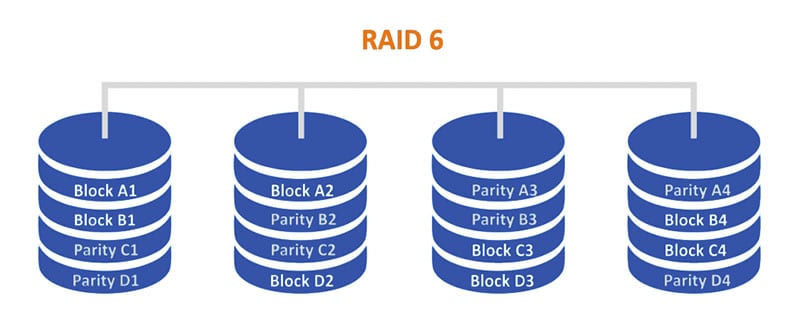
RAIDZ2 (RAID6)
RAIDZ2 is a large, highly reliable, relatively expensive storage, which requires a minimum of 3 disks.
RAIDZ2 is like RAID6 – allows to survive a double disk failure at the expense of storing two different parity functions. All considerations about block placement pattern and block size are the same as for a RAIDZ.
Read speed of the N-disk RAIDZ2 is up to (N-2) times faster (apply the same considerations as for RAIDZ above) than the speed of a single drive, similar to RAIDZ. If one or two drives fail in RAIDZ2, the read speed degrades significantly because a reconstruction of missing blocks requires an entire row to be read.
There is no significant write speed improvement in RAIDZ2 layout. RAIDZ2 parity updates require even more processing than that in RAIDZ.
The capacity of two member drives is used to maintain fault tolerance. For an array of 10 drives 1TB each, the resulting RAIDZ2 capacity would be 8TB.
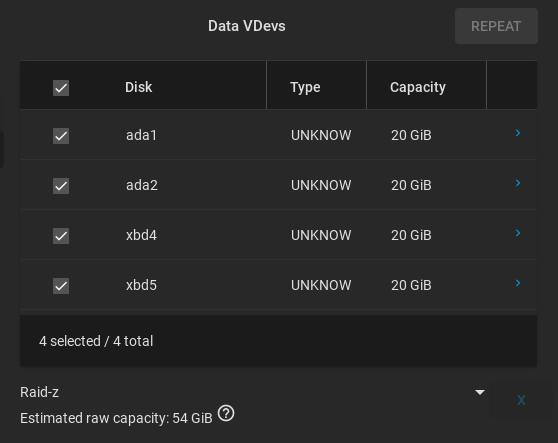
So, it now looks like RAIDZ2 might be the best choice for us as we still get quite a bit of storage and it is nominally fast. We are also building a non-critical system and have more than 3 disks installed. Let’s go with that.
Our estimated “raw storage” with this type is 54GB it seems. Not too bad.
Go ahead and create the pool.
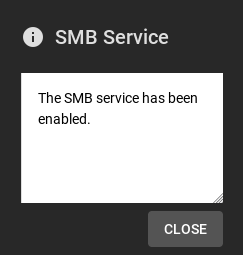
We now want to enable file sharing using the SAMBA protocol. SAMBA allows file sharing between different machines with different operating systems on the same network.
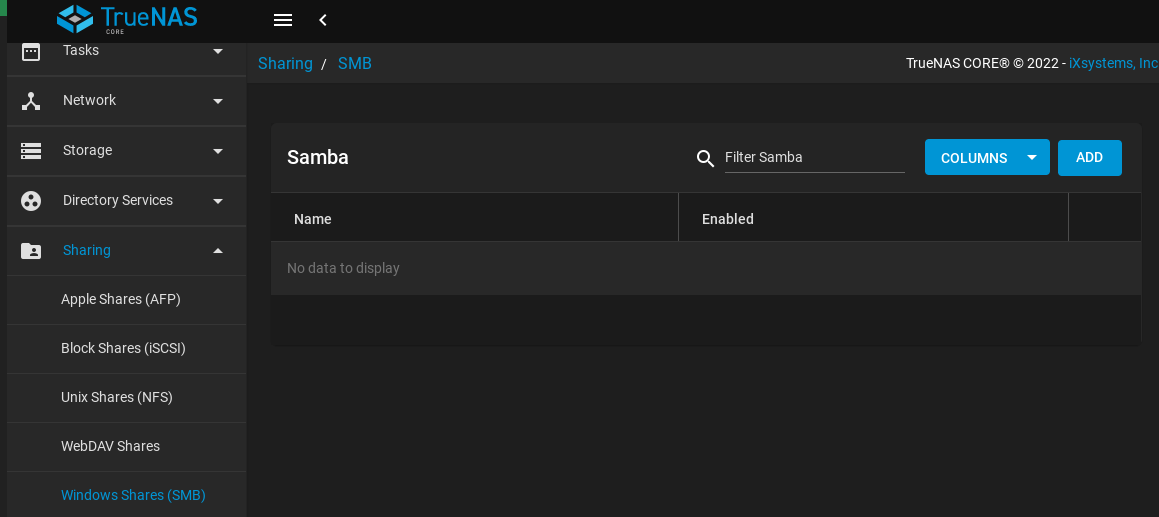
We will need to add a new share and give it a name, path, description and some properties.
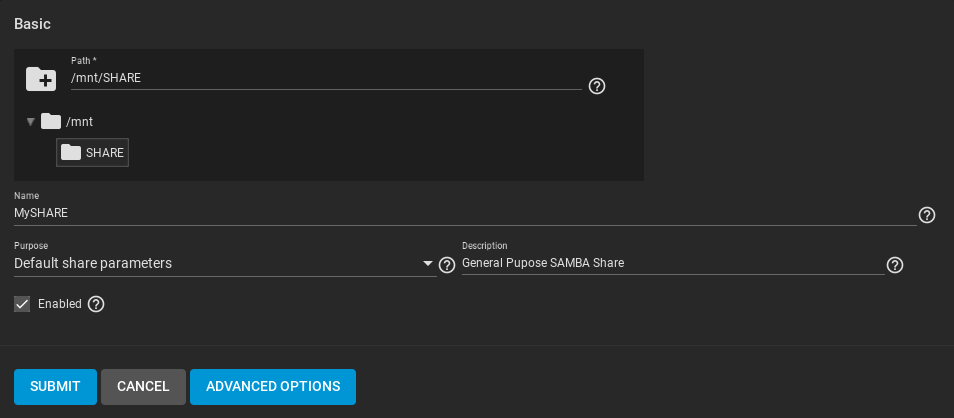
Submit to save.
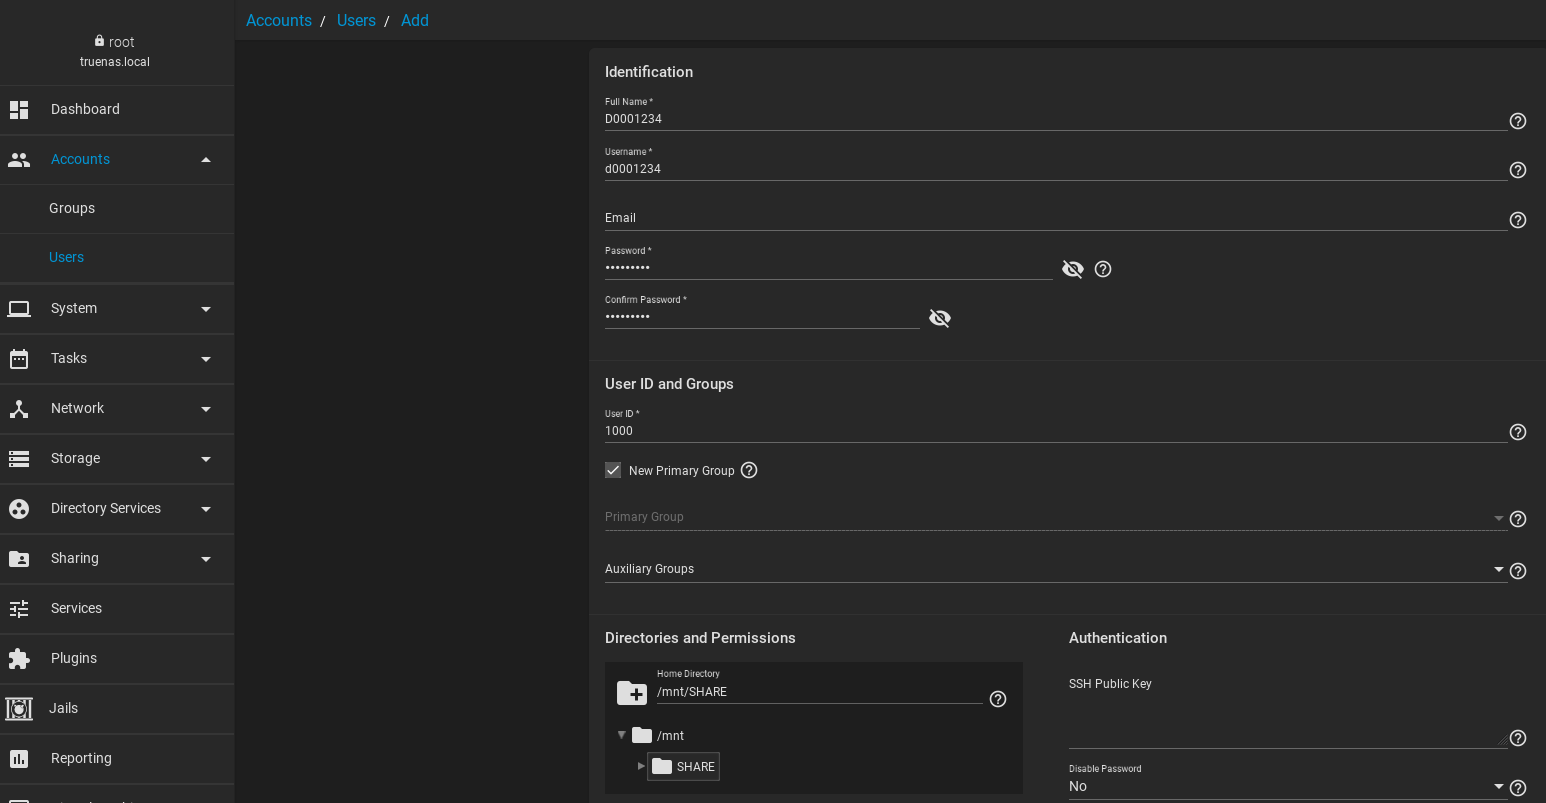
We now need to create a user with permission to access our share.
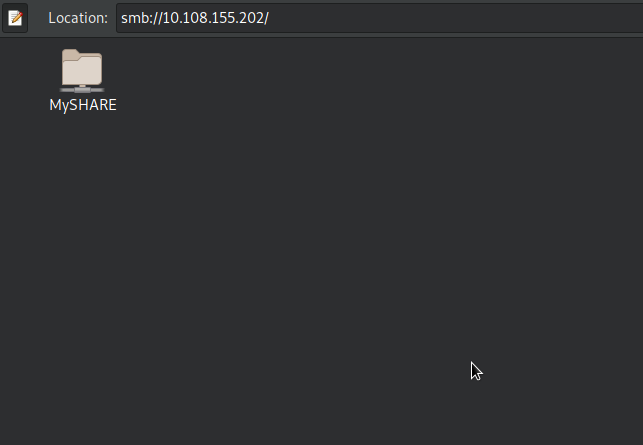
It’s time to test! Your share will be available by IP address using the following formats of the address. For our example (only) the IP is 10.108.155.202
On Windows:
\\10.108.155.202
On Linux and Mac OSX:
smb://10.108.155.202
When you try to access the share folder you will be prompted for the credentials of the user we created earlier.
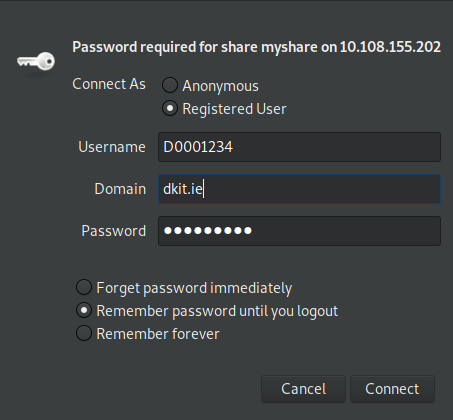
If the credentials are correct, you will have full read/write access to this directory over the network. You can now map it to a permanent location on your desktop if you wish. There are other sharing protocols available, you don’t have to use Samba if you would prefer something else (for example, iSCSI is quite popular if mounting to a server permanently).
Using TrueNAS like this is far less expensive than investing in off the shelf solutions like a Synology Rackstation, and most small offices or even homes have an old PC lying about. In addition, it’s a great use for old retired hard disks that still actually function.