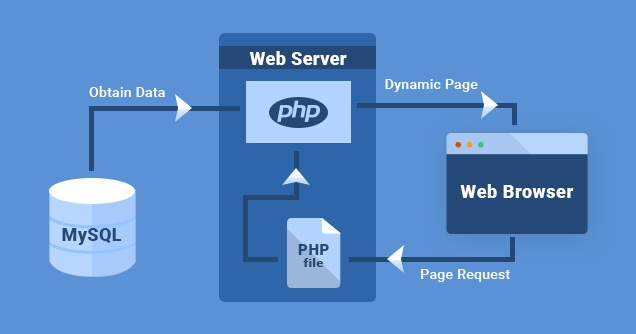
In this tutorial we will show you how to have a PHP Powered Web Server send/obtain data to/from a separate MySQL Database server before presenting the HTML output to the client browser.
Separation of your web application components like this is more realistic than having everything on the one server and allows for scalability and implementation of failover/redundancy methods later on.
To begin, log on to https://xoa.comp.dkit.ie and create two servers using the templates MySQL Server (with PHPMyAdmin) and PHP Web Server (with FTP). Be sure to name them appropriately eg. D0012345_web and D0012345_database
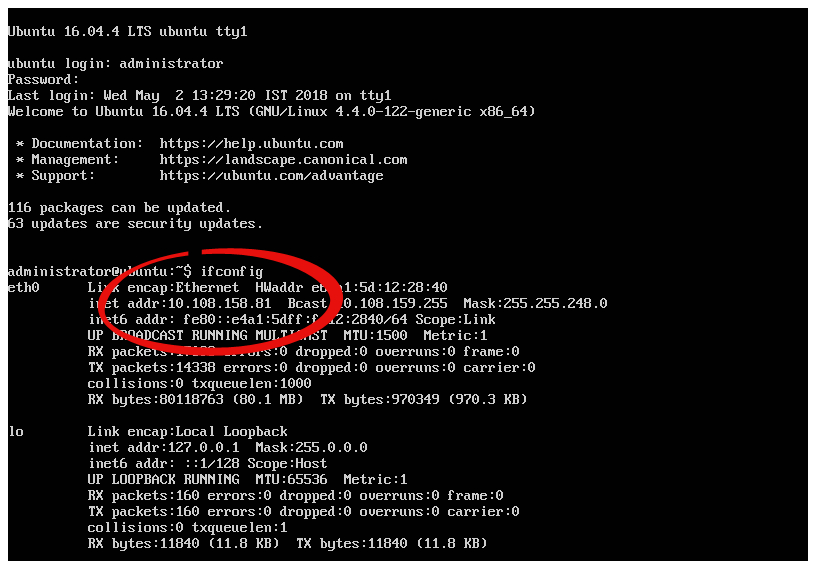
Note the console login is the default administrator used in all the labs. This is also the login for root user of PHPMyAdmin on your database server and the FTP login for your web server. Get the IP addresses of both servers from the console (ipconfig command) and take note.
You should then be able to access PHPMyAdmin easily on your database server (eg. http://10.108.153.219/phpmyadmin) and net2ftp on your web server (eg. http://10.108.158.81//net2ftp) if you prefer to upload files ( we recommend editing the PHP files directly on the web server, but you will need to be comfortable with Linux commands).

For this tutorial, we need to login to PHPMyAdmin and create a database. Note that the username is root and the password as before.
Create new user (we are going to use “tutorial”) and be sure to “Create database with same name and grant all privileges”. You should also “Grant all privileges on wildcard name (username\_%).”

We now have a database and a user/password than we can add to our PHP code to make the connection. You’ll notice that be default, there is a file testmysql.php in the html directory of your web server. Let’s modify that to test connecting to our database server.
<?php

$servername = "10.108.153.219";
$dbname = "tutorial";
$username = "tutorial";
$password = "1234567";

// okay. Let's test the connection....

try {
$conn = new PDO("mysql:host=$servername;dbname=$dbname", $username, $password);
// set the PDO error mode to exception
$conn->setAttribute(PDO::ATTR_ERRMODE, PDO::ERRMODE_EXCEPTION);
echo "Connected successfully to database at ".$servername;

// Now do something with the new connection....


}
catch(PDOException $e)
{
echo "Connection failed: " . $e->getMessage();
echo "<br>Did you enter the IP of your database server for the <i>servername</i> variable?";
}

?>
Then visit testmysql.php in a browser (internal to college this will work on any machine, outside college you may want to fire up a third VM as your client machine eg. Windows 10 and use it via Xen Orchestra to test).
All according to plan, you should see something like this:
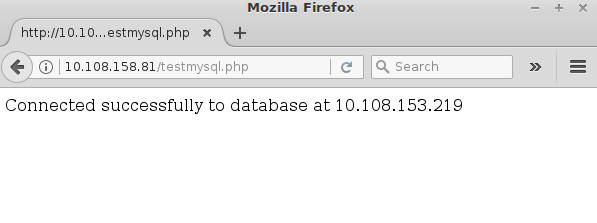
Your web server is now communication with your database server! We are ready to begin building our application.
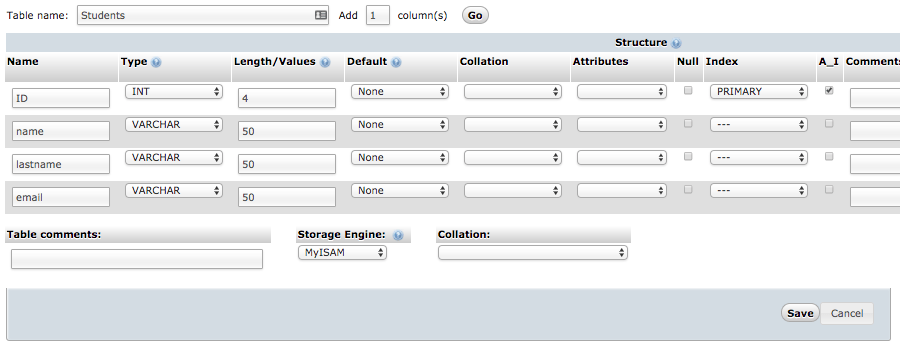
We will create a table named Students for our database. You can create a new table with 4 columns by clicking Create Table button in PHPMyAdmin. After that, you will see this new page where you can enter all the needed information for your table:
This is the most simple setup that you can use for a table, for more information regarding the structure of table/database and what kind of settings you can use with those columns, refer to the official documentation of phpMyAdmin.
For now, here are a few simple explanations of the columns that we used:
- Name – This is the name of your column. It will be displayed at the top of your table.
- Type – You can set a column type here. For example, we selected varchar because we need to enter a string type of name here (which has letters, not numbers).
- Length/Values – Used to specify the maximum length your entry in this column can have.
- Index – We used “Primary” index for our “ID” field. When creating a table, it is recommended to have one ID column. It is used to enumerate table entries and required when configuring table relationships. I also marked “A_I”, which means Auto Increment. This will automatically enumerate the entries (1,2,3,4…).
Click Save and your table will be created.
Now we need PHP code to insert data into our table.
As the connection to the MySQL database in this tutorial is a PDO object, you must use various PDO ‘methods’ (any function that is part of any object) to prepare and run queries. PDO allows you to ‘prepare’ SQL code before it is executed. The SQL query is evaluated and ‘corrected’ before being run. A simplified SQL injection attack could be done just by typing SQL code in to a field on a form.
To use prepared statements, you must write a new variable that calls the prepare() method of the database object.
<?php
$servername = "10.108.153.219";
$database = "tutorial";
$username = "tutorial";
$password = "1234567";
$sql = "mysql:host=$servername;dbname=$database;";
$dsn_Options = [PDO::ATTR_ERRMODE => PDO::ERRMODE_EXCEPTION];

// Create a new connection to the MySQL database using PDO, $my_Db_Connection is an object
try {
  $my_Db_Connection = new PDO($sql, $username, $password, $dsn_Options);
  echo "Connected successfully";
} catch (PDOException $error) {
  echo 'Connection error: ' . $error->getMessage();
}

// Set the variables for the person we want to add to the database
$first_Name = "Thom";
$last_Name = "Vial";
$email = "thom.v@some.com";

// Here we create a variable that calls the prepare() method of the database object
// The SQL query you want to run is entered as the parameter, and placeholders are written like this :placeholder_name
$my_Insert_Statement = $my_Db_Connection->prepare("INSERT INTO Students (name, lastname, email) VALUES (:first_name, :last_name, :email)");

// Now we tell the script which variable each placeholder actually refers to using the bindParam() method
// First parameter is the placeholder in the statement above - the second parameter is a variable that it should refer to
$my_Insert_Statement->bindParam(:first_name, $first_Name);
$my_Insert_Statement->bindParam(:last_name, $last_Name);
$my_Insert_Statement->bindParam(:email, $email);

// Execute the query using the data we just defined
// The execute() method returns TRUE if it is successful and FALSE if it is not, allowing you to write your own messages here
if ($my_Insert_Statement->execute()) {
  echo "New record created successfully";
} else {
  echo "Unable to create record";
}

// At this point you can change the data of the variables and execute again to add more data to the database
$first_Name = "John";
$last_Name = "Smith";
$email = "john.smith@email.com";
$my_Insert_Statement->execute();

// Execute again now that the variables have changed
if ($my_Insert_Statement->execute()) {
  echo "New record created successfully";
} else {
  echo "Unable to create record";
}
On lines 28, 29 and 30, we use the bindParam() method of the database object. There is also the bindValue() method which is very different.
- bindParam() – This method evaluates data when the execute() method is reached. The first time the script reaches an execute() method it sees that $first_Name corresponds to “Thom”, binds that value and runs the query. When the script reaches the second execute()method, it sees that $first_Name now corresponds to “John”, binds that value and runs the query again with the new values. The important thing to remember is that we defined the query once and reused it with different data at different points in the script.
- bindValue() – This method evaluates the data as soon as bindValue() is reached. As the value of $first_Name was set to “Thom” when the bindValue() was reached, it will be used every time an execute() method is called for $my_Insert_Statement.
Notice that we reuse the $first_Name variable and give it a new value the second time. If you check your database after running this script, you have both of the defined names, despite the $first_Name variable equalling “John” at the end of the script. Remember that PHP evaluates an entire script before actually running it.
If you update the script to replace bindParam with bindValue, you will insert into MySQL “Thom Vial” twice in the database and John Smith will be ignored.
If the query that we ran and insert into MySQL database was successful, we will see the following message:

It should now be a simple matter to write a second PHP script to pull the data out and display it back to the browser.
When you are done testing be sure to delete your VMs and free up resources on Xen Orchestra for class use.