WordPress can work as an excellent back-end platform for your next native app, especially if it is content-driven or an online shop. In this article, you will learn the foundations for building mobile apps with React Native and WordPress.
We’ll set up a WordPress website with some content which we’ll use as a datasource for our React Native mobile app. Since WordPress 4.7, we now have the ability to connect to any WordPress install through a preexisting REST API. This allows us to use WordPress as a backend so that we can build things like React Native apps that pull content from our WordPress site.
We’re going to build a React Native app called “Leadership-Quotes” that pulls images from a WordPress media library via the WP REST API and display a random leadership quote with each button click.
Let’s set up a WordPress website first. The quickest way to do this is with the template WordPress Server (with WP-CLI) on https://xoa.comp.dkit.ie.
Once you have your WordPress website set up, you can verify the REST API is working by visiting the correct URL. eg: http://10.108.154.124/wp-json/wp/v2/media (see this tutorial if permalinks are not working for you but you can still visit http://10.108.154.124/?rest_route=/, for example).
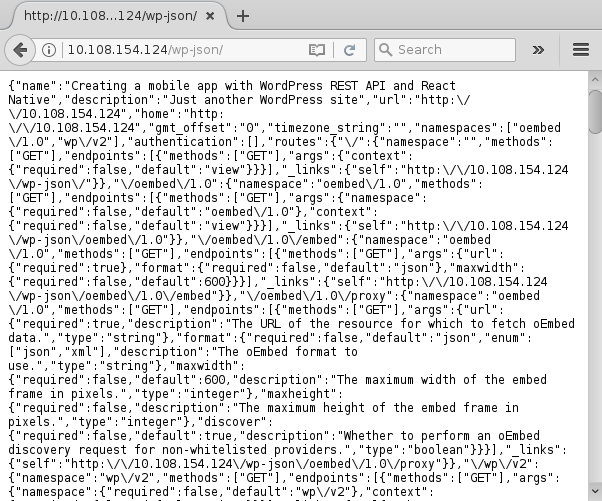
If you see something like the above, and recognize some of the file names listed, then you’re good to go. That’s about it on the WordPress side for now.
Setting up a React Native project
The WP REST API allows for so much innovation with WordPress. Anyone can build whatever they’d like using whatever software they want and use WordPress as the backend. We’re going to use React Native. To keep this brief, brush up on your React Native skills with their getting started guide.
Following the getting started guide bootstraps our project with Create React Native App automatically. And if you’ve successfully followed their tutorial, you should also have Expo installed and ready to go. If not, grab your mobile device and install the Expo client app from your app library. You’ll be using Expo on your mobile device to test your app as you make changes.
In the Terminal, go to the location where you want this app installed for development, and run:
create-react-native-app Leadership-Quotes

cd Leadership-Quotes
npm start
After this, you should see a QR code in your Terminal window. Now open up Expo on your mobile device and click the “Scan QR Code” option, and scan the code. Your phone should refresh to show something like this.
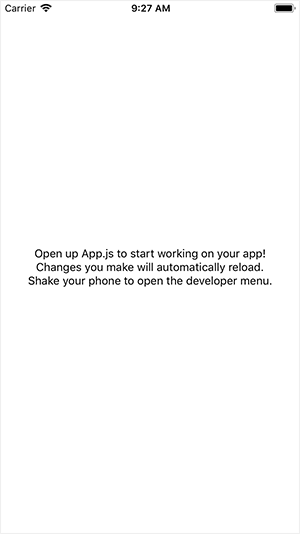
Let’s begin editing the files. Open the App.js file in your favorite text editor. This file has some default code which displays the screen above. Let’s take a look at it.
import React from 'react';
import { StyleSheet, Text, View } from 'react-native';

export default class App extends React.Component {
  render() {
    return (
      < View style={styles.container}>
        < Text>Open up App.js to start working on your app!
        < Text>Changes you make will automatically reload.
        < Text>Shake your phone to open the developer menu.
      < /View>
    );
  }
}

const styles = StyleSheet.create({
  container: {
    flex: 1,
    backgroundColor: '#fff',
    alignItems: 'center',
    justifyContent: 'center',
  },
});
The two import lines extend the React codebase and get it ready for what we need. Let’s add a few more items to that second import.
import { Text, View, StyleSheet, Dimensions, TouchableHighlight, Image } from 'react-native';
Let’s delete the rest of the default code and then add our own below those import tags.
// WP REST API
const REQUEST_URL  = 'http://10.108.154.124/wp-json/wp/v2/media';

// Windowsize is referenced in the styles below.
const windowSize = Dimensions.get('window');

export default class LeadershipCards extends Component {
  constructor(props) {
    super(props);
    this.state = {
      isLoading: true
    }
    this.fetchData = this.fetchData.bind(this);
  }

  getInitialState() {
    return {
      // Card is initially set to null so that the loading message shows.
      card: null,
    };
  }

  componentDidMount() {
    this.fetchData();
  }

  // This is where the magic happens! Fetches the data from our API and updates the application state.
  fetchData() {
    this.setState({
      // We'll also set card to null when loading new cards so that the loading message shows.
      card: null,
    });
    fetch(REQUEST_URL)
      .then((response) => response.json())
      .then((responseData) => {
        // this.setState() will cause the new data to be applied to the UI that is created by the `render` function below.
        this.setState({
          card: { pic: responseData[0].guid.rendered }
        });
      })
    .done();
  }

  // Instead of immediately rendering the template, we now check if there is data in the 'card' variable
  // and render a loading view if it's empty, or the 'card' template if there is data.
  render() {
    if ( !this.state.card ) {
      return this.renderLoadingView();
    }
    return this.renderCard();
  }

  // The loading view template just shows the message "Wait for it..."
  renderLoadingView() {
    return (
      < View style={styles.container}>
        < Text style={styles.text}>
          Wait for it...
        < /Text>
      < /View>
    );
  }

  // This is the original render function, now renamed to renderCard, which will render our main template.
  renderCard() {
    let quote = this.state.card.pic;
    return (
      <View style={styles.container}>
        <View style={styles.imageContainer}>
          <Image style={{width: windowSize.width, height: windowSize.height}} source={{uri: this.state.card.pic}}  />

        <View style={styles.buttonContainer}>
          <TouchableHighlight
            style={styles.button}
            underlayColor='#ccc'
            onPress={this.fetchData}
          >
            <Text style={styles.buttonText}>Next quote
          </TouchableHighlight>
        </View>
      </View>
    );
  }
};

const styles = StyleSheet.create({
  container: {
    flex: 1,
    justifyContent: 'center',
    alignItems: 'center',
    backgroundColor: '#FFFFFF',
  },
  text: {
    fontSize: 18,
    paddingLeft: 20,
    paddingRight: 20,
    textAlign: 'center',
    color: '#333333',
    marginBottom: 5,
  },
  imageContainer: {
    alignItems: 'center',
    flex: 1,
    width: windowSize.width,
    height: windowSize.height,
  },
  buttonContainer: {
    bottom: 0,
    flex: .1,
    width: windowSize.width,
    backgroundColor: '#1488BC',
  },
  button: {
    flex: 1,
    alignItems: 'center',
    justifyContent: 'center',
  },
  buttonText: {
    fontSize: 30,
    color: '#FFFFFF',
  },
});
After saving this, check your device to see if it looks something like this (your image may be different):

If everything connected correctly, you should see an image from the WordPress media library on the screen with a blue button that says, “Next quote.” If you click the button, the same image loads over and over again. While it’s great that we’re connected, it’s not the ideal outcome. We want the app to display a random image from the media library with each click.
Adding customized endpoints to the WP REST API
In order to get our button to work, we need to gather all the media IDs and randomize them for each click of the button. Unfortunately there’s no API endpoint that allows us to just grab an array of media IDs. No problem, like everything, there’s a WordPress plugin for that! You can checkout the source code on GitHub if you want.
Once this is set up, you should be able to visit: [your-domain.com]/wp-json/media-ids/v1/get-all-media-ids to see the API result. It will look a bit like this:
[25,24,23,22,21,20,19,18,17,16,15,14,13,12,11,10,9,8,7,6,5,4,3]
Updating the app to use customized endpoints
Now we just need to update our react native app to utilize this new endpoint and make cacheable requests. First we’ll replace the REQUEST_URL variable with REQUEST_URL_BASE and add two more variables for the different endpoints we’ll be accessing:
const REQUEST_URL_BASE  = 'http://http://10.108.154.124/wp-json/';
const POSTS_URL_PATH    = 'wp/v2/media/';
const GET_MEDIA_IDS_PATH = 'media-ids/v1/get-all-media-ids';
Then we’ll need to add two new properties to the initial state of the app: cardIDs and currentID:
getInitialState() {
    return {
      // Card is initially set to null so that the loading message shows.
      card: null,
      cardIDs: null,
      currentID: null
    };
  }
Next, we’ll add functions to populate those properties in the same App.js file:
getAllIDs() {
  fetch(REQUEST_URL_BASE + GET_MEDIA_IDS_PATH)
  .then((response) => response.json())
  .then((responseData) => {
    this.setState( {
      cardIDs: responseData
    } );
  })
  .then(this.fetchData)
  .done();
}

getRandID() {
  let currentID = this.state.cardIDs[Math.floor(Math.random()*this.state.cardIDs.length)];
  if ( this.state.currentID == currentID ) {
    currentID = this.getRandID();
  } else {
    this.setState( {
      currentID: currentID
    });
  }
  return currentID;
}
You’ll notice that the last thing getAllIDs() does after it has retrieved the list of IDs and added them to the state is that it calls this.fetchData() – this is because fetchData() will need the cardIDsto already be available in the state before it can run. We’ll need to replace fetchData() with getAllIDs() in the componentDidMount()method to make sure that getAllIDs() runs first:
componentDidMount() {
  this.getAllIDs();
}
And then we’ll need to update fetchData() to run getRandID() and then use the random ID to fetch that media item:
fetchData() {
  let currentID = this.getRandID();
  this.setState({
    // We'll also set card to null when loading new cards so that the loading message shows.
    card: null,
  });
  fetch(REQUEST_URL_BASE + POSTS_URL_PATH + currentID)
    .then((response) => response.json())
    .then((responseData) => {
      // this.setState() will cause the new data to be applied to the UI that is created by the `render` function below.
      this.setState({
        card: { pic: responseData.guid.rendered }
      });
    })
  .done();
}
Not much has changed in fetchData(), we’ve added the call to getRandID() at the beginning and then we’re using the output of that along with REQUEST_URL_BASE and POSTS_URL_PATH to access a specific post via the API with a url that is easily cacheable by a server-side caching system such as WP Super Cache or Varnish. Notice that we also removed the array number from responseData.guid.rendered.
Save all that out, and your app should refresh in Expo on your device. Start clicking the button and watch each new image display on screen in random order. You did it!
If you’d like to know more, and try a different project in the same area as this one, then check out Developing an App Using the REST API and WordPress by Tom Ewer.