We previously looked at bringing up a WordPress website using the App Templates on http://docker.comp.dkit.ie. Today we will look at a much quicker way to do the same task, using a “Stack Template”.
A Stack Template is when the yaml file is docker-stack.yml rather than docker-compose.yml and contains multi-container definitions. The different “services” can be brought up on different hosts in the Docker Swarm (ie. A cluster of docker hosts running in “Swarm” mode). We are running 2 hosts in Swarm mode inside the school. Docker01 and Docker02. Students access the swarm via the web frontend http://docker.comp.dkit.ie
You can of course have multiple services in a docker-compose.yml file also, but those services will all run on the same Docker host.
Here’s what a docker-stack.yaml file would look like for a WordPress installation (2 services, using 2 container mysql:5.7 and wordpress:latest)
#this file is stored at stacks/wordpress/docker-stack.yml on the portainer mount
#environment variables and other settings are then managed via portainer web interface

version: '3'

services:
   db:
     image: mysql:5.7
     volumes:
       - db_data:/var/lib/mysql
     restart: always
     environment:
       #root password can be provided by student or hardcoded by an admin in portainer
       MYSQL_ROOT_PASSWORD: ${MYSQL_DATABASE_PASSWORD}
       MYSQL_DATABASE: wordpress
       MYSQL_USER: wordpress
       MYSQL_PASSWORD: wordpress

   wordpress:
     image: wordpress:latest
     ports:
       - 80
     restart: always
     environment:
       WORDPRESS_DB_HOST: db:3306
       WORDPRESS_DB_USER: wordpress
       WORDPRESS_DB_PASSWORD: wordpress

volumes:
    db_data:
And students can access this via the web frontend under App Templates.
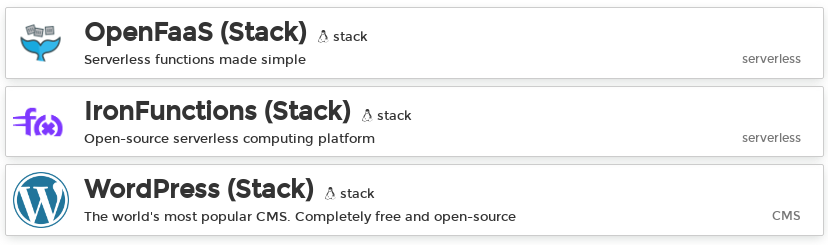
It’s crazy easy to bring a new WordPress instance using the Stack Template. You don’t even need to create Private Network or anything in advance!
Click on WordPress (Stack) and give your stack a name.

Then click Deploy the stack and you’re done. No seriously, that’s all there is to it. Your stack is up before you realise it, you just need to get it’s details so you know how to access it. The reason the process is so fast is because our stack also creates the required MySQL database container/service and provides the WordPress container/service with all the details it needs to connect. If you run through the WordPress setup later on you’ll see you aren’t prompted for any database details at all.. you are finished in no time!
Let’s get the details of our WordPress installation so we can get to that point asap.
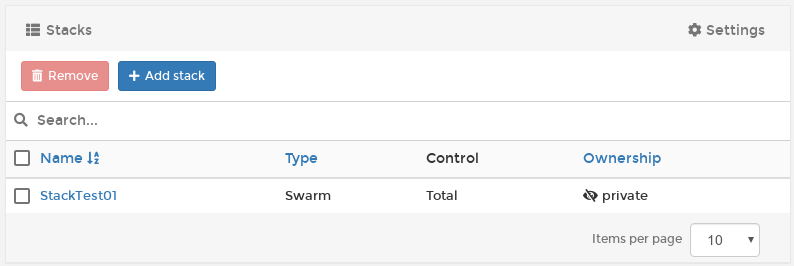
Click on your stack in the list to see the details. We are particularly interested in the Services that have been brought up.
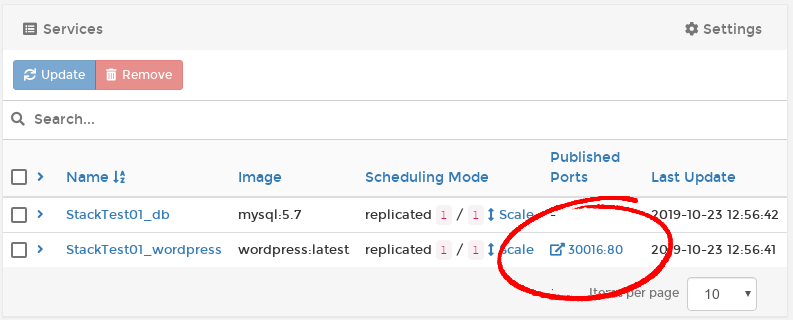
As you can see, our WordPress container is running on Port 80 (obviously) but is mapped to port 30016 on the host(s). We can now access our WordPress installation by visiting http://docker01.comp.dkit.ie (or http://docker02.comp.dkit.ie as we are using a stack in Swarm mode) on port 30016 (not port 80, important!)
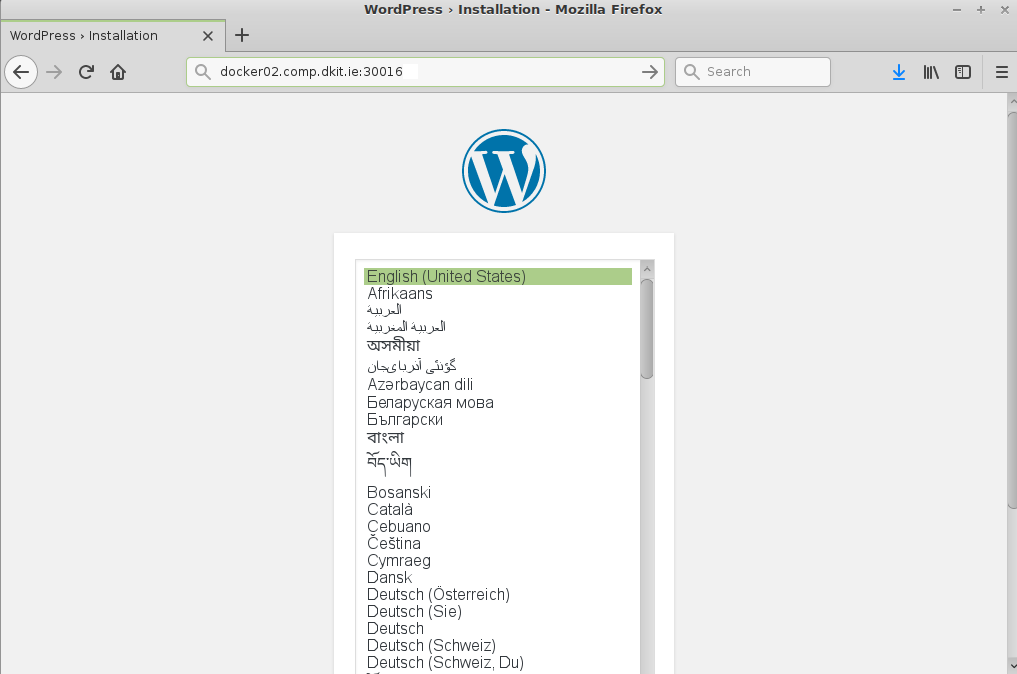
Run through the setup now, you’ll be amazed how fast it is as you are no longer asked for database connection details. You can just get on with your web project!
Tip: If you were off campus you could still get to your WordPress by firing up a desktop VM inside XOA and using it’s browser.