Students can now create a fully functional Moodle server from a template in XOA. By doing this they can gain valuable experience in setting up an Online Learning Platform. Moodle is offered as a cloud application by many providers and used by schools and colleges across the world, so this tutorial is worth a read!
Been living under a rock? Let’s explain what Moodle is again just for you….

Moodle is a free and open-source learning management system (LMS) written in PHP and distributed under the GNU General Public License. Developed on pedagogical principles, Moodle is used for blended learning, distance education, flipped classroom and other e-learning projects in schools, universities, workplaces and other sectors.
With customisable management features, it is used to create private websites with online courses for educators and trainers to achieve learning goals. Moodle (acronym for modular object-oriented dynamic learning environment) allows for extending and tailoring learning environments using community-sourced plugins.
We use Moodle extensively on DkIT.
Getting Started
To boot your very own Moodle server, use the template of the same name found in http://xoa.comp.dkit.ie
You can login by entering the server IP address in a browser and using the default credentials that we use for all our templates.

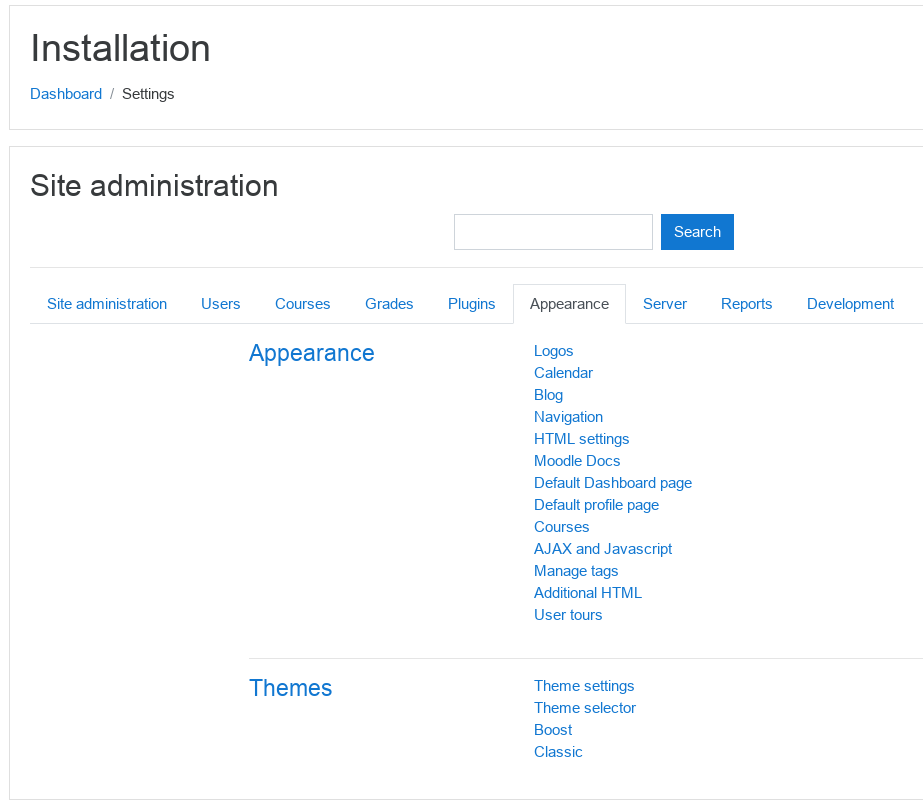
Once on the dashboard, the first thing to do is customise the appearance of your Moodle instance.
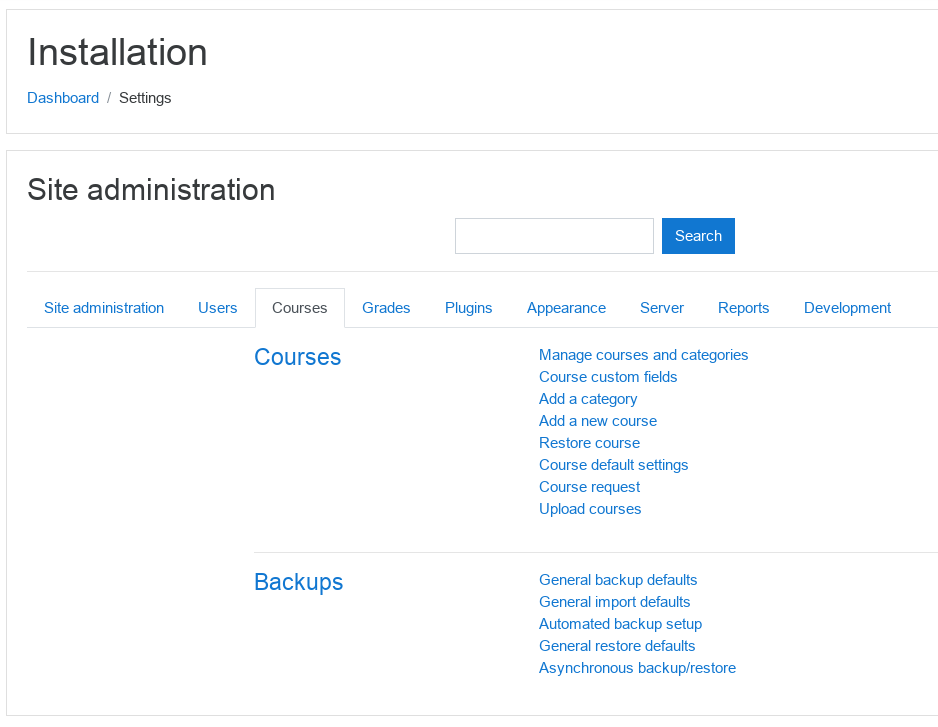
Then create your first course…
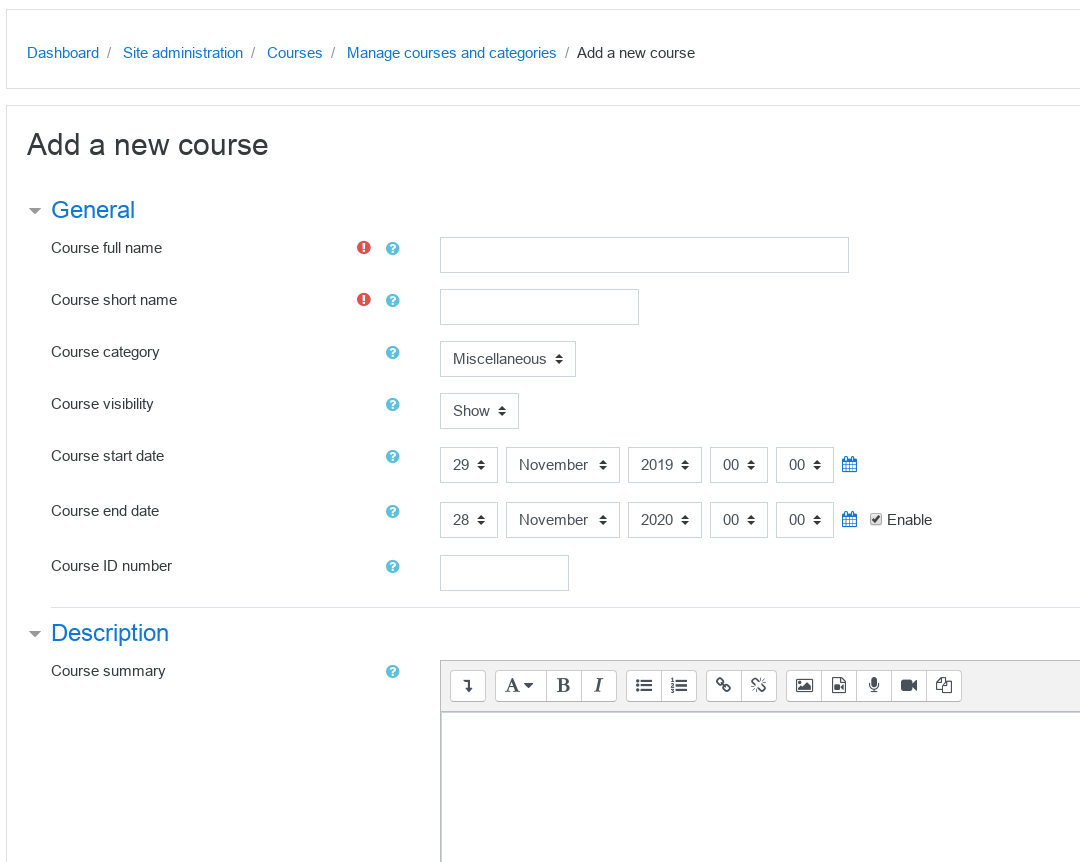
…and fill in all the required information. More information here.
There are so many things you can configure, and many things you SHOULD configure, but we are going to let you play with this one rather than give you all the instructional steps we usually so. The online documentation is extensive and very clear.
See how close to the DkIT Moodle experience you can get for your imaginary students!
Authentication
The email-based self-registration authentication method enables users to create their own accounts via the ‘Create new account’ button on the login page. They then receive an email at the address they specified in their account profile to confirm their account.
- Go to Administration > Site administration > Plugins > Authentication > Manage authentication and click the crossed-out-eye icon opposite email-based self-registration
- Select email-based self-registration from the self registration drop-down menu in the common settings (further down the same page, underneath the authentication plugins)
- Click the ‘Save changes’ button

Enabling self registration results in the possibility of spammers creating accounts in order to use forum posts, blog entries etc. for spam. This risk can be minimised by limiting self registration to particular email domains with the allowed email domains setting in Administration > Site administration > Plugins> Authentication > Manage authentication.
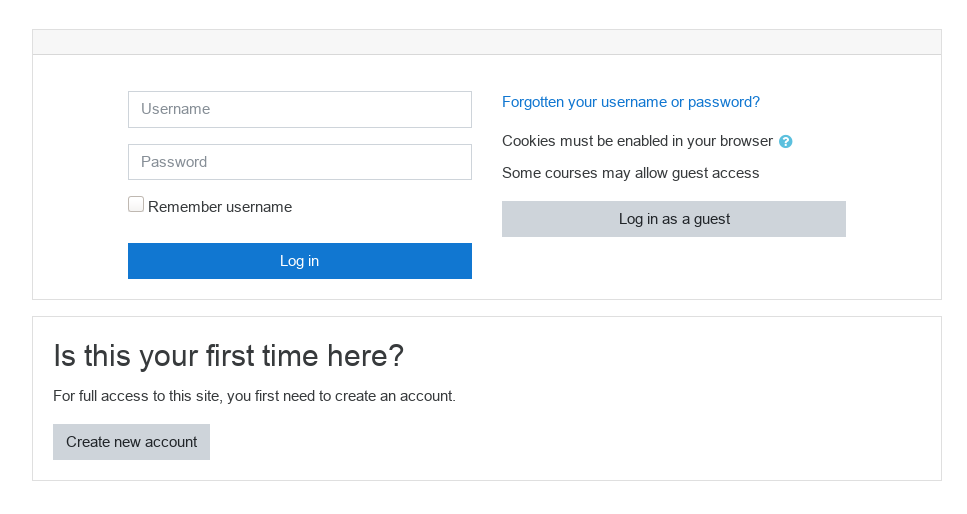
Once enabled, the login screen will now look like this:
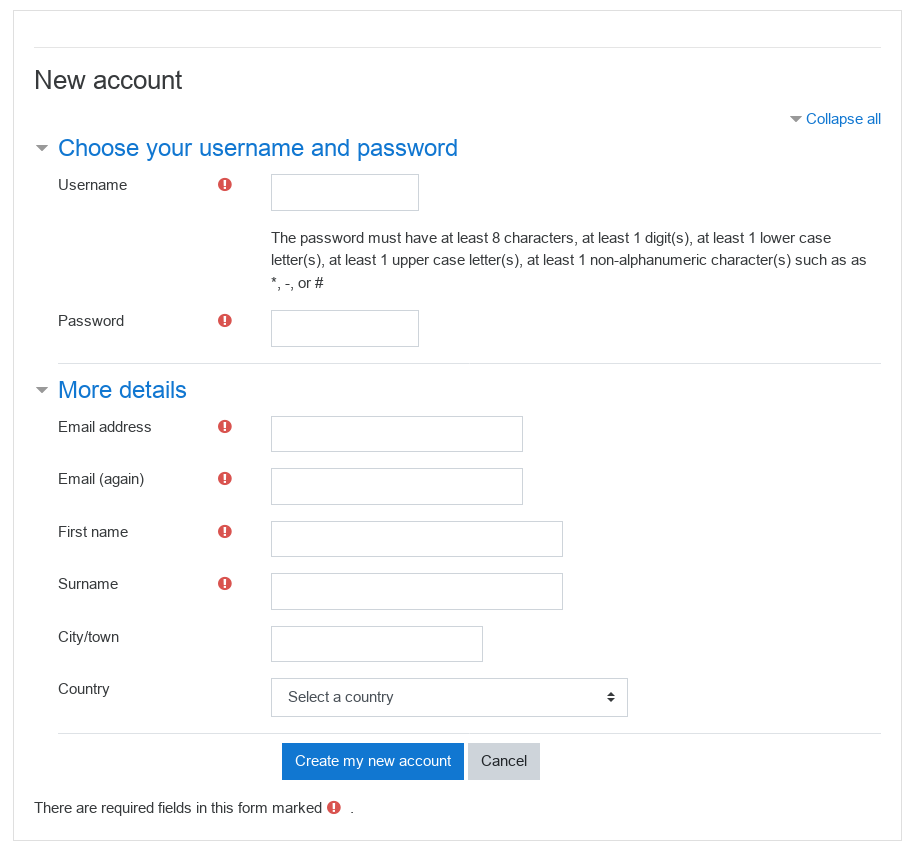
When choosing “Create new account” the user is now asked for the following details:
Be sure you have configured your server to send email to students before using this facility for real!
Conclusion
Here’s our parting advise for setting up your first Moodle server:
Start with the structure
Moodle has a hierarchical structure. Activities or Resources belong to Topics, which belong to a Course that is housed in a Category. So think about how you want to organise your information so the hierarchy makes sense. For example, a lesson on Hair Care for dogs might go in a Topic about Grooming, which will be part of a wider course, “Dog Owners 101”. All similar courses will be housed in one category- which in this case may be Pet Care. Of course if you don’t need this hierarchy, you don’t have to use it. But a well-organised eLearning makes sense to learners, and makes it easier for us to manage it!
Choose your Resources/Activities wisely
Moodle comes out-of-box with an impressive array of options to use. You could choose to house your content in a lesson, book, folder or a page. Assess the learners through choice, assignments, feedback, quiz, reach out to them via News Forum, chat, Label. Need more functionality- explore Glossary or a survey. For a starter, the options can be confusing. Here are our suggestions:
- If your content is multimedia or interactive, or sits well in a single screen length, consider using page. This creates a simple webpage, and is easiest to create and manage.
- If you need to deliver multiple pages worth of content, consider lesson. Lesson is a multi-page activity, where you can define custom paths, embed question pages, and generally provide learner some choice as per their learning route.
- Book activity makes sense if you have considerable amount of data that should be organized as an e-book. One great advantage of Book is that learners can print off the whole book in one go, unlike the lesson.
- Quizzes in Moodle are easy to create, especially if you are familiar with GIFT format. Simple multiple choice or free text assessments are good to go through the quiz.
- However, if you need the students to upload something, consider assignments for greater flexibility.
Look closely at the settings
A lot of power that Moodle has is hidden in that small gear button besides everything you create. Different settings can result in significantly different user experiences. For example, quiz settings can provide adaptive questions, immediate feedback, certainty based marking and so on… How lessons appear, what does the user see, can they mark an activity complete, when does an activity become available- these are all options hidden in the settings. If you are new to Moodle, take the time and effort to play with it, so you learn the functions of each little option on the settings page.
Make it jazzy, make it branded. The homepage
There is no excuse to implement Moodle with it default FrontPage. Unfortunately there is not too much of freedom here for a non-programmer, but you still have some leeway in terms of how your LMS will look without paying a single penny to a programmer. You could choose from one of the many themes that come pre-packaged with the LMS, and change the default look and feel. The FrontPage has a “general Summary of Site” section that you can jazz up with images and all.. The web has a number of lovely Moodle implementations to take inspiration from. We, as instructional designers, and as adult learners, know how much appeal does good design has in learning. Let’s not let Moodle’s unfriendliness ruin it for our learners.
Language Pack – you have the power
This is a gem that stays hidden for a long time for a lot of Moodle Managers, The language tab in site administration lets you download the language pack for your installation of Moodle. This is a one-time activity. And then, you can customise the language Moodle uses to interact with your users. The errors, the site messages like change passwords, etc. can all be customised to say exactly what you want to say. Even choose an alternate login page if you are up to it using the customisations!!