In this tutorial we will be creating a very simple Node application, that will allow users to input data that they want to store in a MongoDB database. You can use the the existing template in XenServer to launch a Linux machine with Node.js and MongoDB pre-installed.
Before we get started , let’s describe a few terms that you will frequently hear when creating a stack application like this. After that we will start building our example.
CRUD
CRUD is an acronym that means Create, Read, Update and Delete. It is used to describe the process of having your data persisted into a database. In this example you will be providing examples of Creating new data into the database.
Restful API
A RESTful API is an application program interface that uses HTTP requests to GET, PUT, POST and DELETE data. We will be using an API to define when we add data to our database.
Creating a Node Application
To get started we would recommend creating a new database that will contain our application. For this demo we are creating a directory called node-demo. After creating the directory you will need to change into that directory.
mkdir node-demo
cd node-demo
Once we are in the directory we will need to create an application and we can do this by running the command:
npm init
This will ask you a series of questions. Here are the answers we gave to the prompts.
administrator@ubuntu:~/node-demo$ npm init
This utility will walk you through creating a package.json file.
It only covers the most common items, and tries to guess sensible defaults.

See `npm help json` for definitive documentation on these fields
and exactly what they do.

Use `npm install <pkg>` afterwards to install a package and
save it as a dependency in the package.json file.

Press ^C at any time to quit.
package name: (demo)
version: (1.0.0)
description: Node demo showing how to store data inside a MongoDB database
entry point: (index.js)
test command:
git repository:
keywords:
author: Joe Bloggs
license: (ISC)
About to write to /home/administrator/node-demo/package.json:

{
  "name": "demo",
  "version": "1.0.0",
  "description": "Node demo showing how to store data inside a MongoDB database",
  "main": "index.js",
  "scripts": {
    "test": "echo \"Error: no test specified\" && exit 1"
  },
  "author": "Joe Bloggs",
  "license": "ISC"
}


Is this OK? (yes) yes
The first step is to create a file that will contain our code for our Node.js server.
nano app.js
In our app.js we are going to add the following code to build a very simple Node.js Application.
var express = require("express");
var app = express();
var port = 3000;

app.get("/", (req, res) => {
  res.send("Hello World");
});

app.listen(port, () => {
  console.log("Server listening on port " + port);
});
What the code does is require the express.js application. It then creates app by calling express. We define our port to be 3000.
The app.use line will listen to requests from the browser and will return the text “Hello World” back to the browser.
The last line actually starts the server and tells it to listen on port 3000.
Installing Express
Our app.js requires the Express.js module. If it doesn’t already exist, we need to install express in order for this to work properly. Go to your terminal and enter this command.
npm install express --save
This command will install the express module into our package.json. The module is installed as a dependency in our package.json as shown below.
{
  "name": "demo",
  "version": "1.0.0",
  "description": "Node demo showing how to store data inside a MongoDB database",
  "main": "index.js",
  "scripts": {
    "test": "echo \"Error: no test specified\" && exit 1"
  },
  "author": "Joe Bloggs",
  "license": "ISC",
  "dependencies": {
    "body-parser": "^1.18.2",
    "express": "^4.16.3",
    "mongoose": "^5.0.16"
  }
}
To test our application you can go to the terminal and enter the command
node app.js
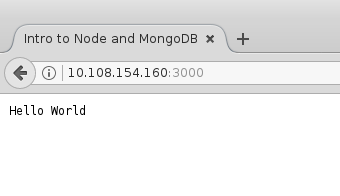
Open up a browser and navigate to the url of your server in the form of http://<ip_address_of_vm>:3000 eg. http://10.108.154.160:3000/

Creating a Website to Save Data to MongoDB Database
Instead of showing the text “Hello World” when people view your application, what we want to do is to show a place for user to save data to the database.
We are going to allow users to enter a username that we will be saving in the database (if you feel adventurous later on, you can also generate passwords for new users).
To gather the user data, we will need to create a basic HTML file called index.html. The contents of this file will be:
<!DOCTYPE html>
<html>
  <head>
    <title>Intro to Node and MongoDB</title>
  <head>

  <body>
    <h1>Intro to Node and MongoDB</h1>
    <form method="post" action="/addname">
      <label>Add A User</label><br>
      <input type="text" name="userName" placeholder="Enter username..." required>
      <input type="submit" value="Add User">
    </form>
  <body>
<html>
If you are familiar with HTML, you will not find anything unusual in our code. We are simply creating a form where users can input their username and then click an “Add User” button.
The form will do a post call to the /addname endpoint. We will be talking about endpoints and post later in this tutorial.
Displaying our Website to Users
We were previously displaying the text “Hello World” to users when they visited our website. Now we want to display our html file that we created. To do this we will need to change the app.get line our our app.js file.
We will be using the sendFile command to show the index.html file. We will need to tell the server exactly where to find the index.html file. We can do that by using a node global call __dirname. The __dirname will provide the current directly where the command was run. We will then append the path to our index.html file.
The app.get lines will need to be changed to
app.get("/", (req, res) => {
     sendFile(__dirname + "/index.html");
});
Once you have saved your app.js file, we can test it by going to terminal and running node app.js again.
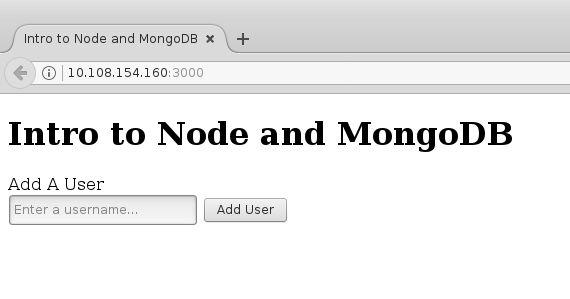
Open your browser again and go to your application’s URL. You will now see the following:
Connecting to the Database
Now we need to add our database to the application. We will be connecting to a MongoDB database. We are am assuming that you already have MongoDB installed and running on your server (if you are using the XenServer template, then it is).
To connect to the MongoDB database in this tutorial we are going to use a module called “Mongoose” (note there ARE other ways to connect). We will need to install mongoose module just like we did with express. Go to your terminal and enter the following command.
npm install mongoose --save
This will install the mongoose model and add it as a dependency in our package.json.
Now that we have the mongoose module installed, we need to connect to the database in our app.js file. MongoDB, by default, runs on port 27017. You connect to the database by telling it the location of the database and the name of the database.
In our app.js file after the line for the port and before the app.use line, enter the following two lines to get access to mongoose and to connect to the database. For the database, we are going to use “node-demo”.
var mongoose = require("mongoose");
mongoose.Promise = global.Promise;
mongoose.connect("mongodb://localhost:27017/node-demo");
Creating a Database Schema
Once the user enters data in the input field and clicks the add button, we want the contents of the input field to be stored in the database. In order to know the format of the data in the database, we need to have a Schema.
For this tutorial, we will need a very simple Schema that has only two fields. We are going to call the field firstName and lastName. The data stored in both fields will be a String.
After connecting to the database in our app.js we need to define our Schema. Here are the lines you need to add to the app.js.
var nameSchema = new mongoose.Schema({
  userName: String
});
Once we have built our Schema, we need to create a model from it. We are going to call our model “DataInput”. Here is the line you will add next to create our mode.
var User = mongoose.model("User", nameSchema);
Creating RESTful API
Now that we have a connection to our database, we need to create the mechanism by which data will be added to the database. This is done through our REST API. We will need to create an endpoint that will be used to send data to our server. Once the server receives this data then it will store the data in the database.
An endpoint is a route that our server will be listening to to get data from the browser. We already have one route that we have created already in the application and that is the route that is listening at the endpoint “/” which is the homepage of our application.
HTML Verbs in a REST API
The communication between the client(the browser) and the server is done through an HTTP verb. The most common HTTP verbs are
GET, PUT, POST, and DELETE.
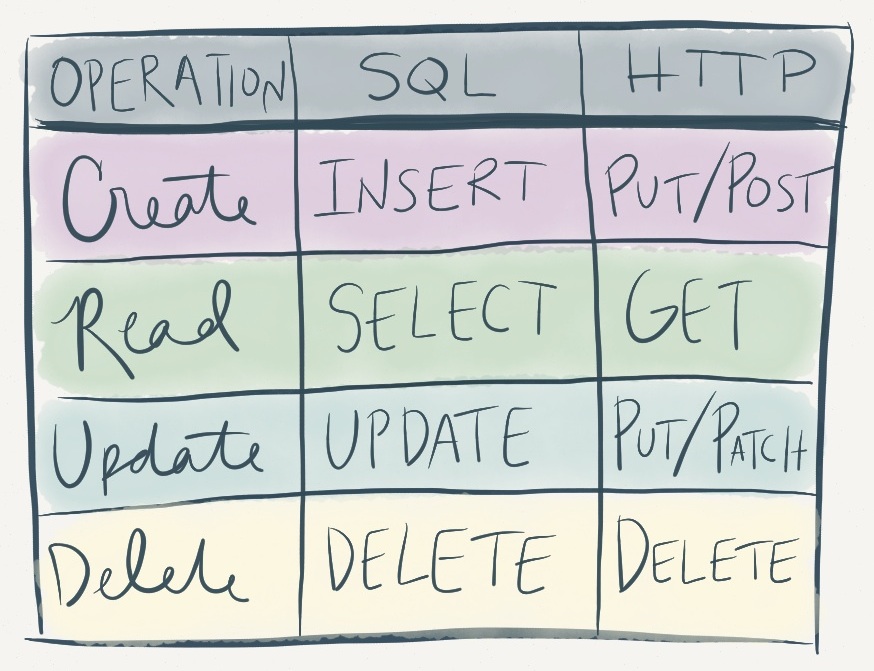
The following table explains how CRUD operations map to these HTTP (and MySQL, for reference) verbs.
Building a CRUD endpoint
If you remember, the form in our index.html file used a post method to call this endpoint. We will now create this endpoint.
In our previous endpoint we used a “GET” http verb to display the index.html file. We are going to do something very similar but instead of using “GET”, we are going to use “POST”. To get started this is what the framework of our endpoint will look like.
app.post("/addname", (req, res) => {

});
Express Middleware
To fill out the contents of our endpoint, we want to store the firstName and lastName entered by the user into the database. The values for firstName and lastName are in the body of the request that we send to the server. We want to capture that data, convert it to JSON and store it into the database.
Express.js version 4 removed all middleware. To parse the data in the body we will need to add middleware into our application to provide this functionality. We will be using the body-parser module. We need to install it, so in your terminal window enter the following command:
npm install body-parser --save
Once it is installed, we will need to require this module and configure it. The configuration will allow us to pass the data for firstName and lastName in the body to the server. It can also convert that data into JSON format. This will be handy because we can take this formatted data and save it directly into our database!
To add the body-parser middleware to our application and configure it, we can add the following lines directly after the line that sets our port.
var bodyParser = require('body-parser');
app.use(bodyParser.json());
app.use(bodyParser.urlencoded({ extended: true }));
Saving Data to the Database
Mongoose provides a “save” function that will take a JSON object and store it in the database. Our body-parser middleware, will convert the user’s input into the JSON format for us.
To save the data into the database, we need to create a new instance of our model that we created early. We will pass into this instance the user’s input. Once we have it then we just need to enter the command “save”.
Mongoose will return a promise on a save to the database. A promise is what is returned when the save to the database completes. This save will either finish successfully or it will fail. A promise provides two methods that will handle both of these scenarios.
If this save to the database was successful it will return to the .then segment of the promise. In this case we want to send text back the user to let them know the data was saved to the database.
If it fails it will return to the .catch segment of the promise. In this case, we want to send text back to the user telling them the data was not saved to the database. It is best practice to also change the statusCode that is returned from the default 200 to a 400. A 400 statusCode signifies that the operation failed.
Now putting all of this together here is what our final endpoint will look like:
app.post("/addname", (req, res) => {
  var myData = new User(req.body);
  myData.save()
    .then(item => {
      res.send("item saved to database");
    })
    .catch(err => {
      res.status(400).send("unable to save to database");
    });
});
Testing our Code
Save your code. Go to your terminal and enter the command node app.js to start our server again. Open up your browser and navigate to the URL of your application once more. You will see our index.html file displayed to you.
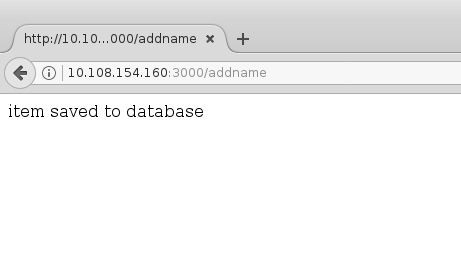
Enter your username in the input field and then click the “Add User” button. You should get back text that says the name has been saved to the database like below.
You can verify that the data was indeed written to the database by issuing several mongo commands at the terminal (if you’ve used mysql command before, you’ll note it’s not too different):
administrator@ubuntu:~/node-demo$ mongo
MongoDB shell version: 3.2.19
connecting to: test
> show databases;
local      0.000GB
node-demo  0.000GB
> use node-demo;
switched to db node-demo
> show collections;
users
> db.users.find()
{ "_id" : ObjectId("5ae06d774c76ed234b911cf6"), "userName" : "bloggsj", "__v" : 0 }
> exit
bye
administrator@ubuntu:~/node-demo$
Note that “show tables” will yield the same result as “show collections” in mongo. The syntax of db.<table>.find() might be the only thing that throws you here. Have a look here for some reference material.
The full, completed content of app.js now resembles the following:
var express = require("express");
var app = express();
var port = 3000;

var bodyParser = require('body-parser');
app.use(bodyParser.json());
app.use(bodyParser.urlencoded({ extended: true }));

var mongoose = require("mongoose");
mongoose.Promise = global.Promise;
mongoose.connect("mongodb://localhost:27017/node-demo");

var nameSchema = new mongoose.Schema({
  userName: String
});

var User = mongoose.model("User", nameSchema);

app.get("/", (req, res) => {
res.sendFile(__dirname + "/index.html");
});

app.listen(port, () => {
  console.log("Server listening on port " + port);
});

app.post("/addname", (req, res) => {
  var myData = new User(req.body);
  myData.save()
    .then(item => {
      res.send("item saved to database");
    })
    .catch(err => {
      res.status(400).send("unable to save to database");
    });
});
Fancy having a go at outputting the data back to the browser yourself? Go, on, at least try!


