This tutorial follows on from Creating a Private Network for Your Docker Containers and is part of a series. If this is your first time here, maybe start at the beginning.
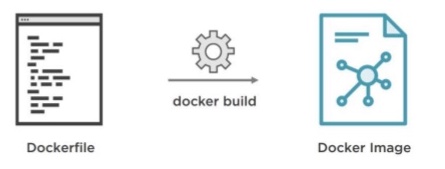
In Docker, there are images and there are containers. The two are closely related, but distinct. Let’s be clear on this distinction before we go any further.
An image is an inert, immutable, file that’s essentially a snapshot. Images will produce a container when they are “run”. Images are stored in a Docker “Registry” (we have a DkIT Registry you can use, or there are many public ones). Because they can become quite large, images are designed to be composed of layers of other images, allowing a minimal amount of data to be sent when transferring images over the network (more later).
To use a programming metaphor, if an image is a class, then a container is an “instance” of an image. Containers are hopefully why you’re using Docker; they’re lightweight and portable encapsulations of an environment in which to run applications. You can have many running containers of the same image.

When creating a container, Docker downloads images from the Docker public registry in the case of nonavailability on the local host. We can also tell Docker to pull from our own on-campus registry as we may want to use a specific image we created ourselves today, yesterday, last month etc.

While it’s very easy to pull pre-built images from DockerHub, or even use the App Templates we have provided (discussed in a later tutorial), ultimate control (and experience) can be gained by “rolling your own”. So let’s build our own image for later use when we go to create containers. We will then tag it and add it upload to the DkIT Registry.
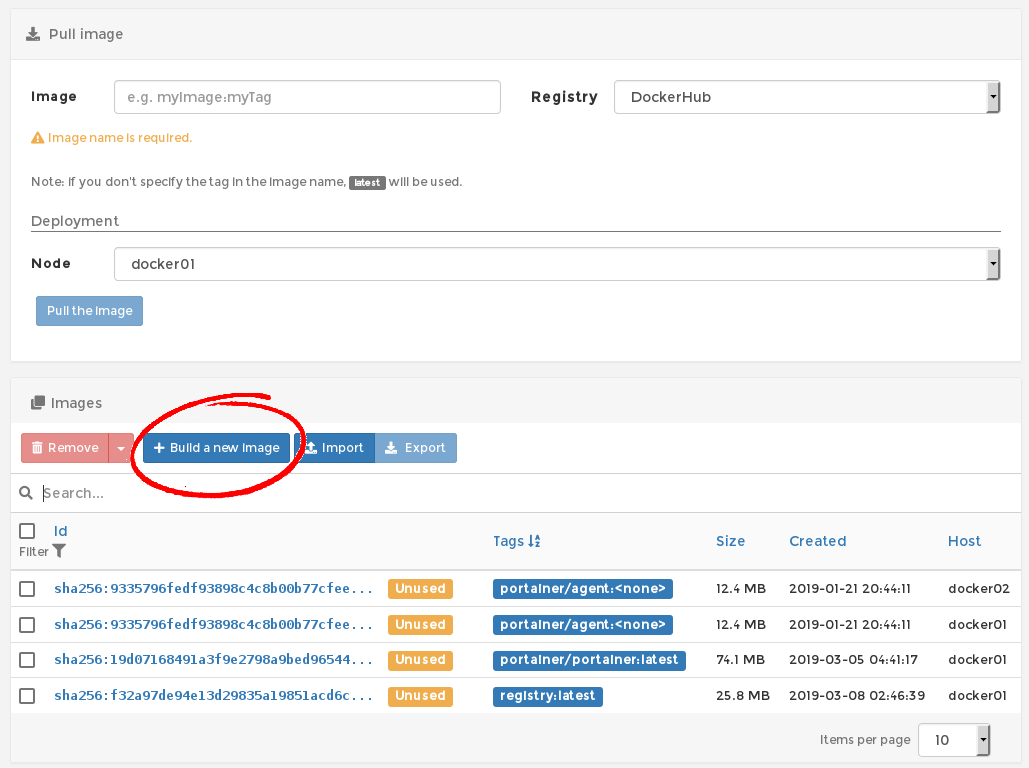
Click on Images in the menu. There is a lot going on in the resulting image page. You can choose to Pull an image from the public or private Registry, you can examine images currently sitting on the local host (you can also remove ones belonging to yourself), you and can Import/Export an image from/to your local PC and you can Build a new image. We want to build our own image.
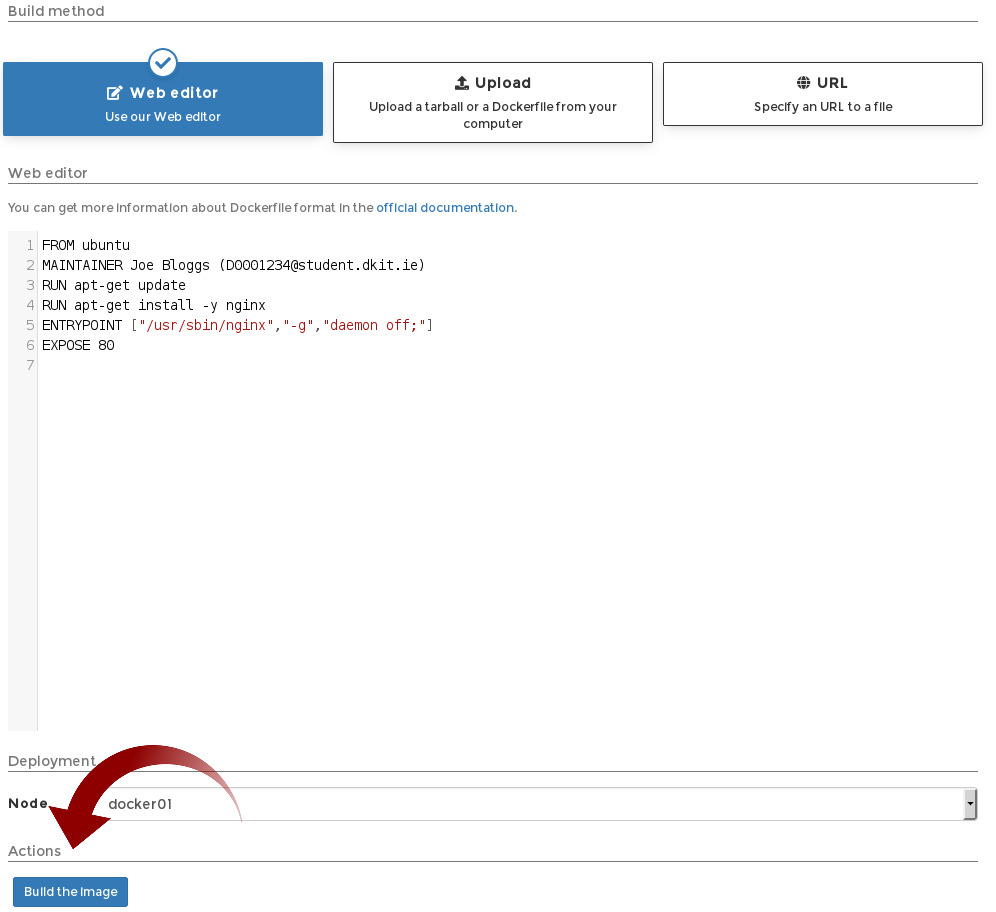
Give your image a name, again, something unique. As we are going to build an image for Nginx, let’s call it “d001234_nginx”. This format is consistent with the name of the network we create earlier, but note here it MUST be all lowercase (previously we chose to make it lower case). You’ll actually get an error if you try to use UPPERCASE in an image name.
There are 3 options to build our image:
- Web Editor – write your own Dockerfile from scratch. Very powerful.
- Upload – upload a Dockerfile you exported earlier or acquired elsewhere.
- URL – specify the URL of a Dockerfile, perhaps on GitHub or a blog you visited.
We are going to compose our own Dockerfile using the web editor. Here’s what it looks like:
FROM ubuntu
MAINTAINER Joe Bloggs (D0001234@student.dkit.ie)
RUN apt-get update
RUN apt-get install -y nginx
ENTRYPOINT ["/usr/sbin/nginx","-g","daemon off;"]
EXPOSE 80
It’s simple enough, but let’s explain it anyway.
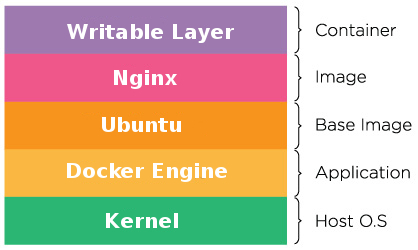
Specifying “FROM ubuntu” means the official Ubuntu Docker Image will be used as a base layer. If this image does not exist locally already, it will be pulled and our image will be layered over it, like this:
ENTRYPOINT is a command that will always run when the final container starts. As we are building an Nginx image, we want any container created from this image to come up with the Nginx server running, obviously.
The “-g” switch sets global configuration directives.
For Docker containers (or for debugging), the daemon off; directive tells Nginx to stay in the foreground. For containers this is useful as best practice is for one container = one process. One server (container) has and should only have one service. Remember, this is NOT a server or a VM.
In the last line we are basically opening up port 80 for web traffic to the Nginx server.
See, pretty simple! Have a look here for further info.
Now, click Build them image.
When the image is built you will find it now in the image list.
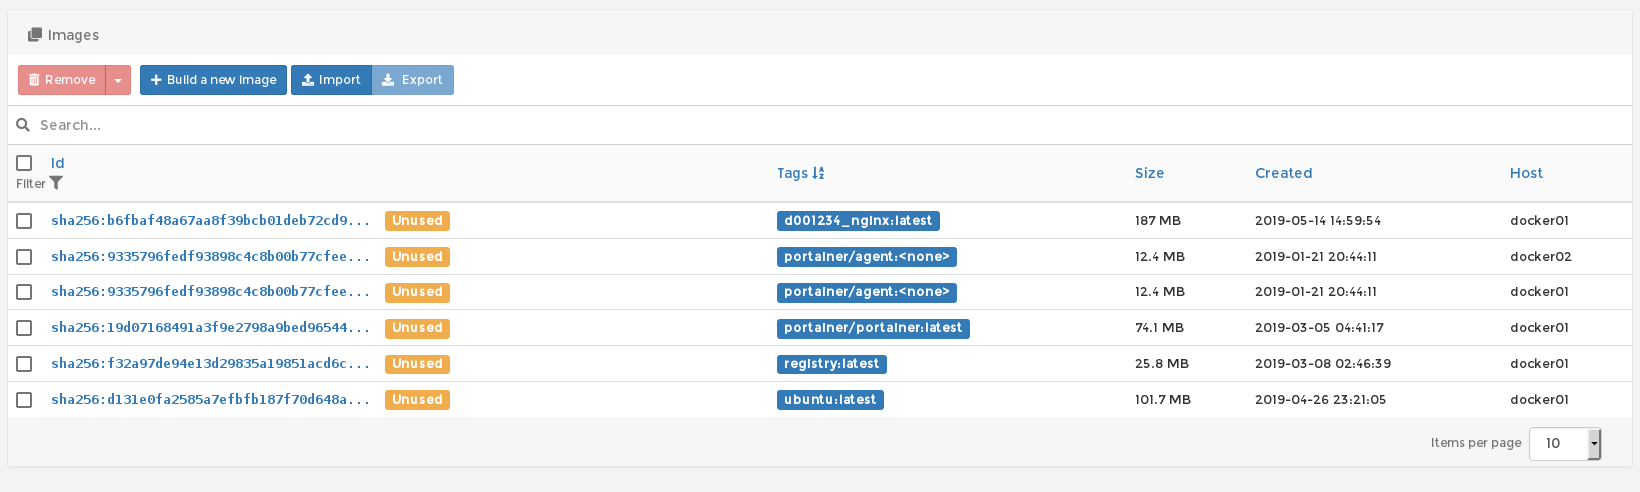
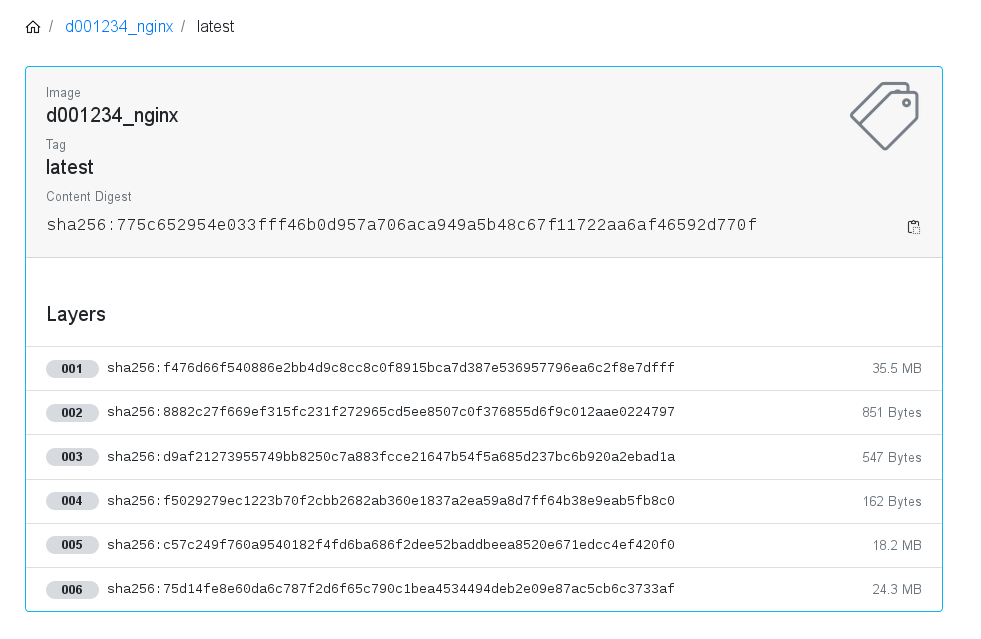
If you click on the image you will see plenty of details about it, including it’s local filesystem tag. You can also see all it’s layers, which is very interesting.
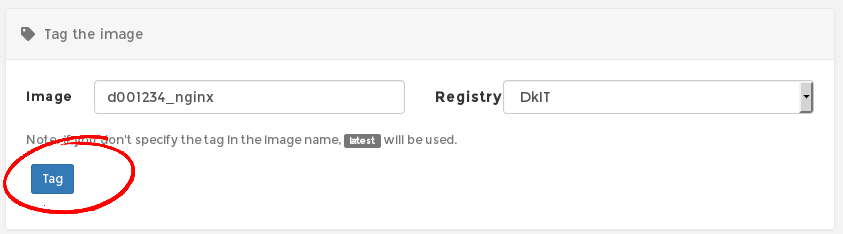
What we are now going to do is add an additional tag to the image for use in the DkIT Registry. The tag can actually be the same as the previous one used locally… in fact it’s a good idea as it will help us remember it.
You will see your additional tag for the DkIT Registry now in the tag list.
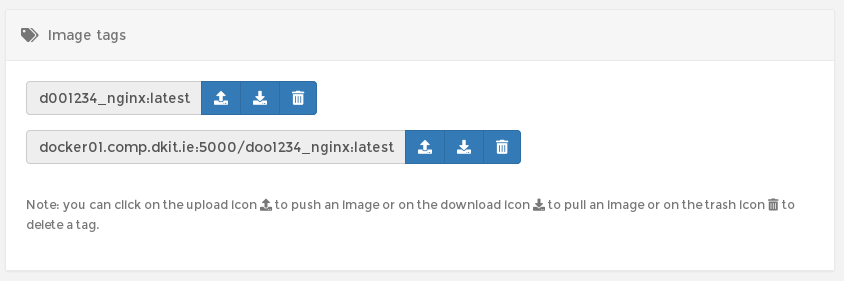
Now you can upload (“Push”) your image to the registry. This means that even that your image will be available to you later when it comes to creating containers for web server! It’s also worth noting that other users will be able to based containers based on your image. They will just need to know the name of the image when pulling from the registry.
Students cannot upload to DockerHub via the web frontend. However, there is nothing stopping you doing this in your OWN Docker host created via XOA. You can even then pull that image into https://docker.comp.dkit.ie
Can’t remember the name of your image or any additional tags you added? Check out the Registry Browser at http://docker01.comp.dkit.ie:10000/ (internal DkIT tool only).
See notes in this future article about about keeping your images organised better using “namespaces”.

Orphaned tags are deleted automatically every month and all images over 3 years old are also deleted regularly. Each month a cleanup script deletes images on the host not being used by any containers (so be sure to Push your image!!!).
In addition, periodically we manually clean out the entire system of unused images, volumes, networks etc, so if there is an image you really, REALLY want to keep for future use, export it.
Next we will be Creating a Docker Container from a Pulled Image. This is where the real fun starts!