This tutorial follows on from Creating a Docker Container from a Pulled Image and is part of a series. If this is your first time here, maybe start at the beginning.
In the next tutorial we are going to need at least 3 containers, all of which are available as “App Templates” in our Docker web frontend. So we’ll use these templates now to create our 3 containers before we move on. You already know how to build an image from scratch, but more often than not one of these templates will do the job much quicker (think of the “Quick Instances” we use in XOA the rest of the time).
Click on App Templates in the menu. Immediately you will notice that the list is empty. This is because by default the list shows “Full Stack” Templates. As none of these are available inside DkIT right now, toggle Show Container Templates to see what is on offer.
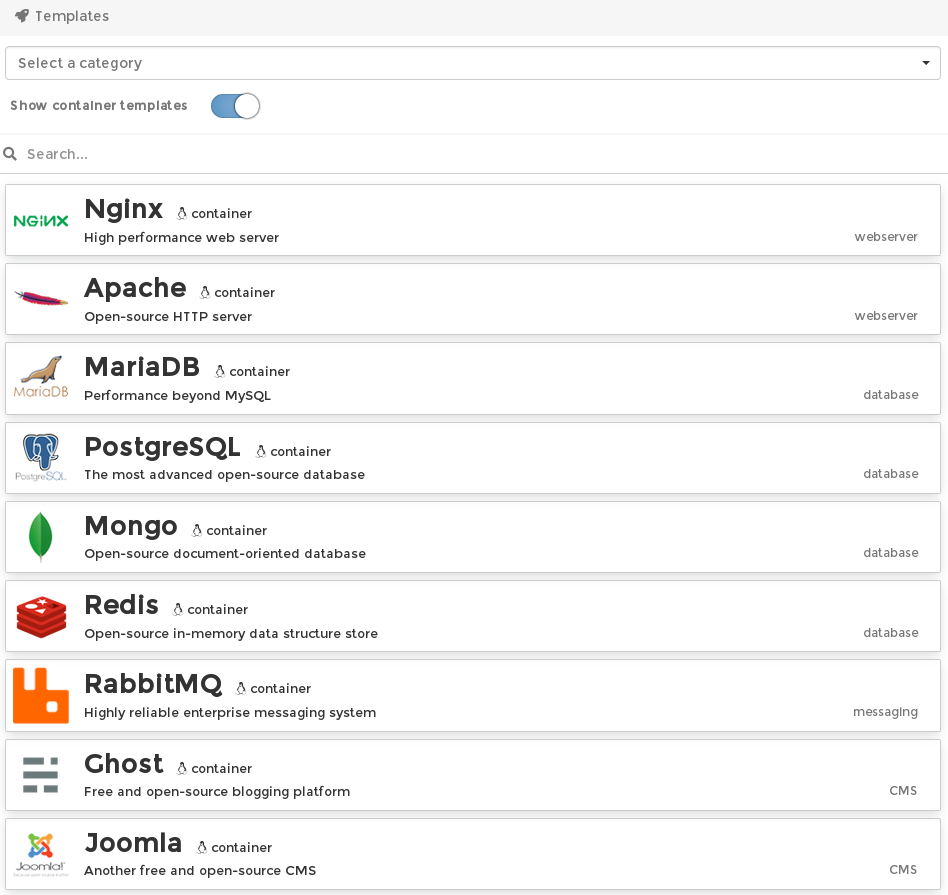
Wow! There’s lots of those. Some were actually put together by Computer Services for us to use in DkIT, and more will be added over time. Templates have most of the settings required included (eg. ports), but if anything else is required there will be an input box on screen when creating your container (eg. database password).
For our Network Project, we are going to recreate the tutorial Create a WordPress Post from Node.js. for this to work, we have decided we need the following containers:
- A WordPress instance that runs the PHP and hosts the WordPress files
- A MySQL or similar database to store website data. MariaDB will suit this
- A Node.js instance to host our app
Be sure to attach your Private Network to each container.
The WordPress template requires no configuration whatsoever. Give it a name and attach the network.
MariaDB also wants a name and a network; in addition it wants a root password for the database server (maybe write that down as you are going to need it later).

Node.js is just as simple to create, nothing special required. It’s not a server, so it won’t have any published ports on the private network. This container will host our client “app”.
So just like that we have our 3 containers.
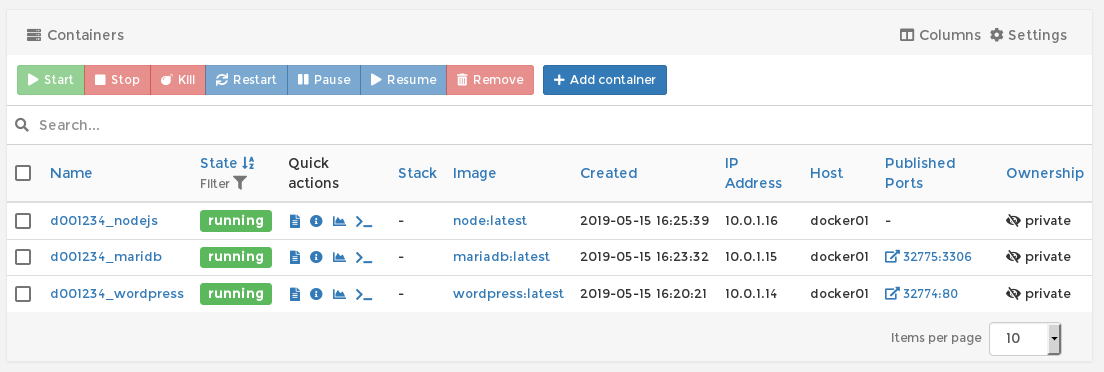
They all have IP addresses and published ports (where required). We’re all good to go for the next tutorial!
Just a quick not on these templates… if you look at the top of any particular one just before you fire a container, you can see what image was used to build that particular template.

This is useful if you like what this template has to offer but would like to make some changes. You can use the image as a base layer when writing your own dockerfile.