Many of you will be working from home this term, and some of you will be using a Raspberry Pi to carry out various assignments, including using Mathematica – an incredibly powerful computation engine for processing data and math. These instructions will help you get started.
There are 3 parts:
- The physical setup of your Raspberry Pi hardware
- Installing the Raspbian Desktop Operating System
- Installing the Mathematica software package
Please read each section carefully and also follow any links provided.
Setting Up The Hardware
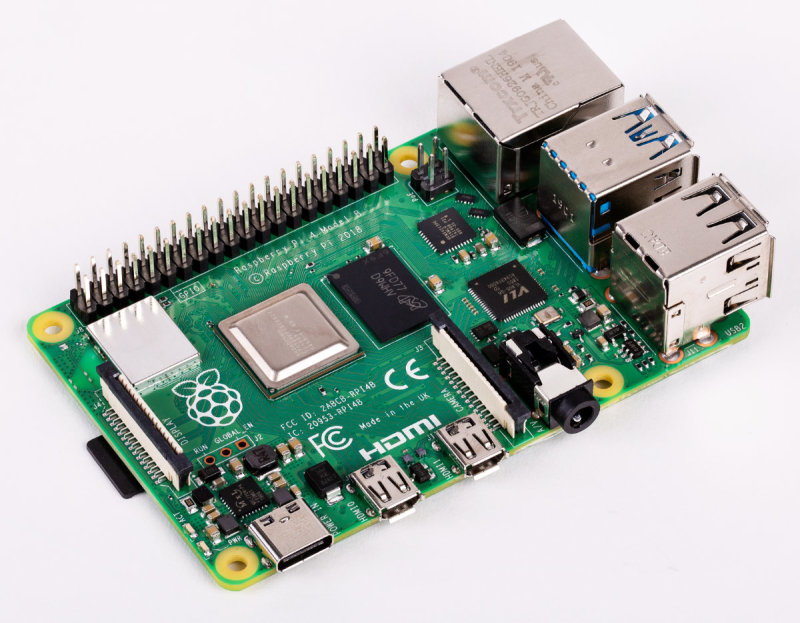
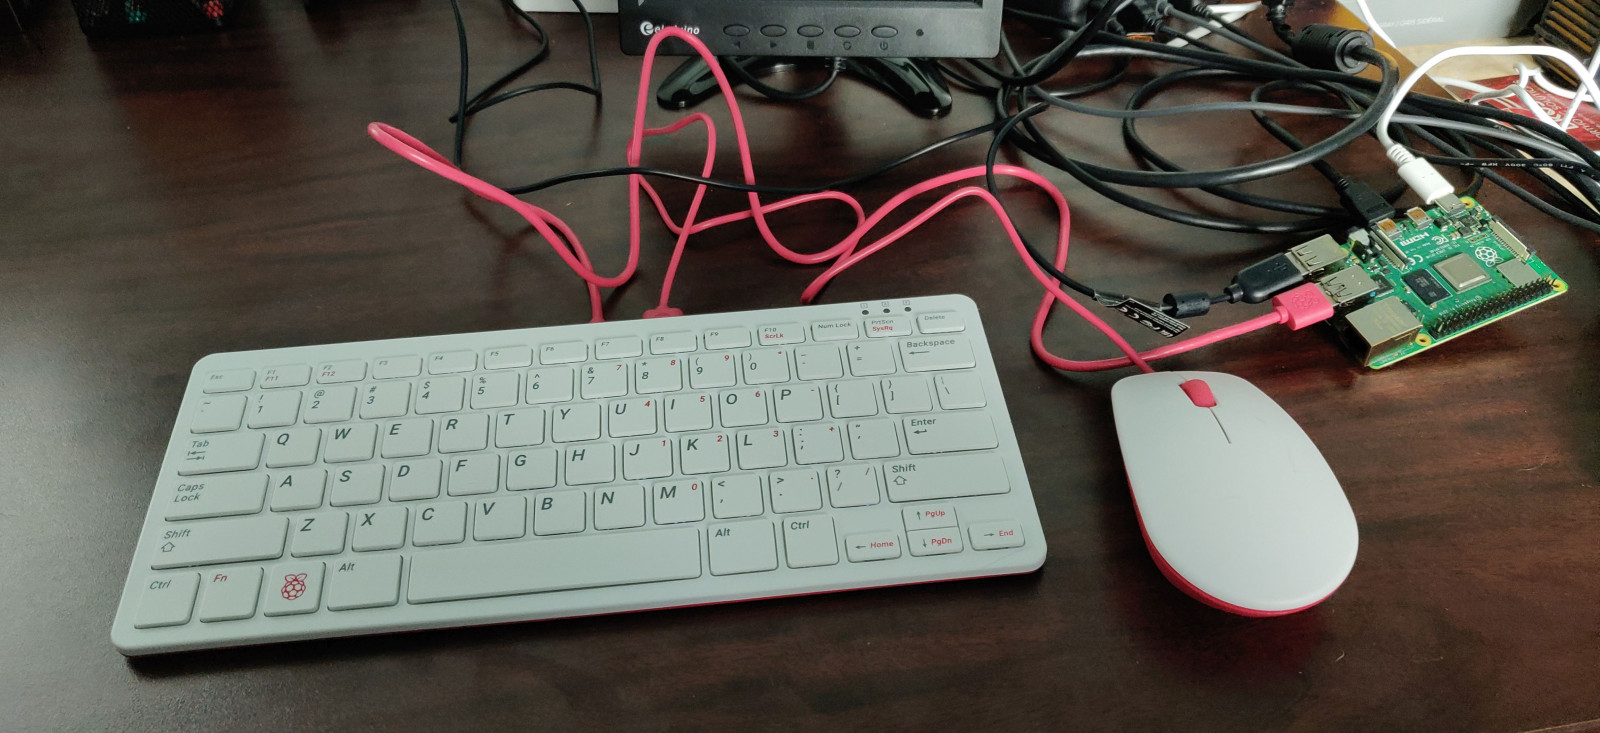
The physical set of a Raspberry Pi is quite simple. We will discuss the latest model, the Raspberry Pi 4 Model B, as you most likely are using this.
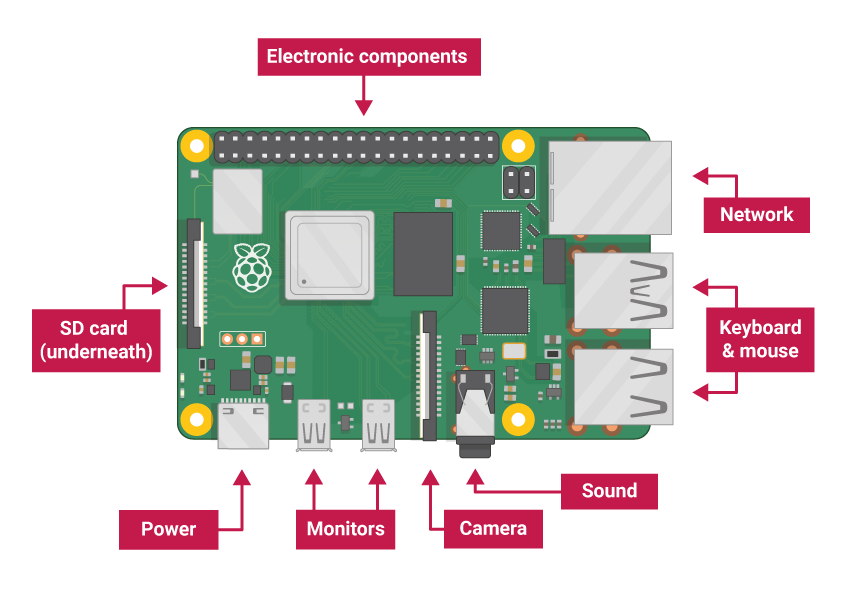
For the purpose of using a desktop operating system, you are mostly interested in connecting the following:
- Monitor (via micro HDMI connection to a HDMI Monitor or TV, never your laptop’s HDMI out connection. You may need an adapter cable of some kind to connect to regular HDMI ports, likely boxed with your Pi, but also available here should you lose it).
- USB Keyboard and Mouse (for obvious reasons)
- Ethernet Network Cable (optional, at least until you setup wifi) connected to a LAN port on your broadband router
Do not insert the SD card yet and do not apply power to the power connection until the SD card is ready and inserted (also, NEVER remove the SD Card while the Pi is powered on. This will corrupt the card).
Your Raspberry Pi is now physically setup.
Installing The Operating System
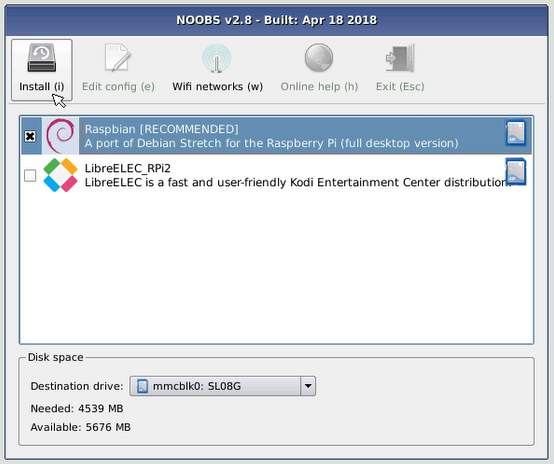
To use Mathematica, we need the Raspbian Desktop (also known now as “Raspberry Pi OS”). If you do not have an SD Card with NOOBS already on it, then you will need to download the image to your PC or laptop. However, you could also just skip NOOBS and download Raspberry Pi OS itself as we are sure this is the NOOBS option we actually want.
If you already have an SD Card with NOOBS on it, skip down the page a bit to “Now, once the card is ready, insert it into your Raspberry Pi‘s dedicated slot …”. You need not worry about how to burn an SD Card image.
Raspberry Pi OS is a Debian Linux-based operating system for Raspberry Pi. If you are unfamiliar with Linux, just know if is an Operating System just like Microsoft Windows (with applications, a desktop, device drivers etc) but it is FREE to use, requires very little memory and is very, VERY flexible.
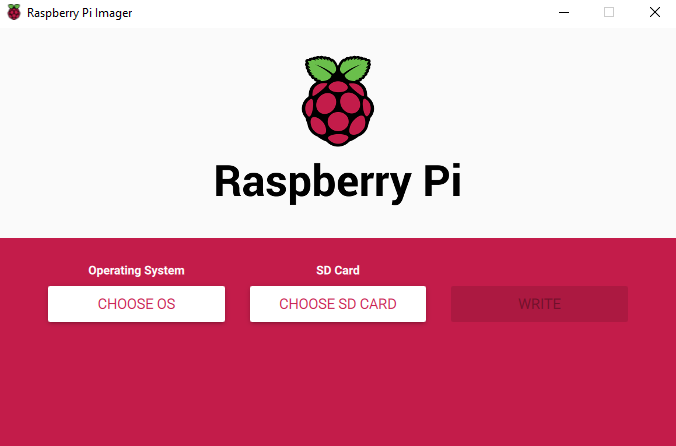
On your PC or laptop, use the Raspberry Pi Imager tool (found here) to burn a local (or remote – if you didn’t grab the latest) image to your SD Card via an SD Card Writer device (found on most laptops).
Etcher is also a good tool for this task, provided you have a local .img file ready to burn (it’s also good for taking a backup of you final SD Card setup). If your laptop does not have the required slot for an SD card, you can always purchase an adapter.

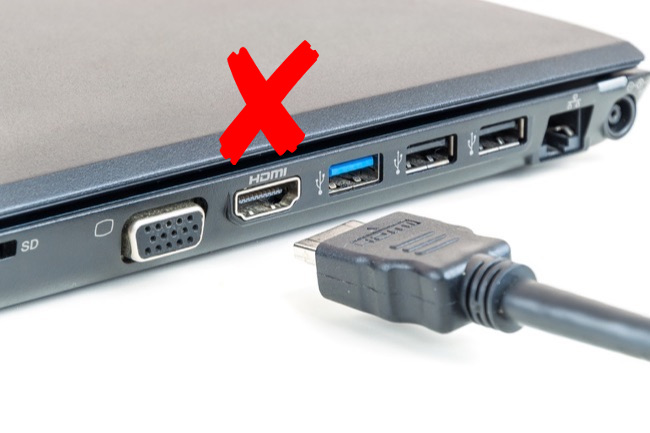
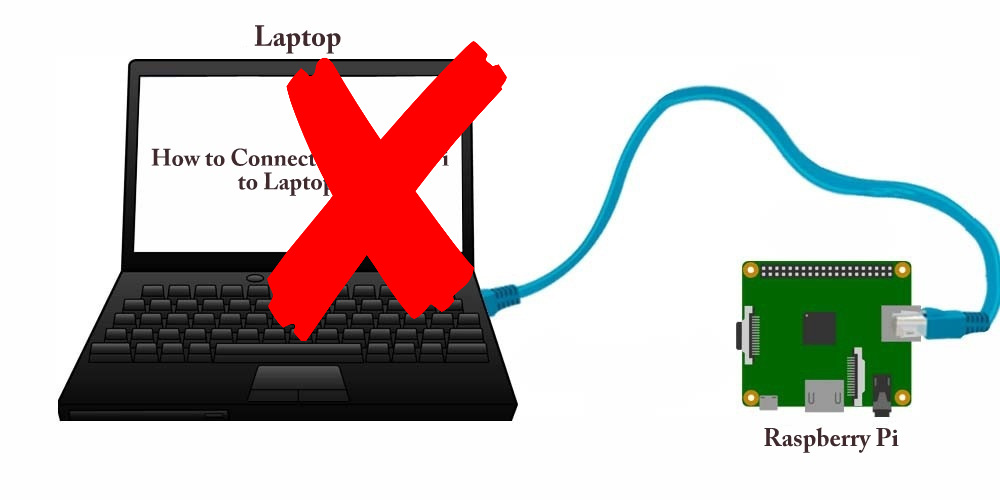
You cannot connect the Raspberry Pi to your laptop via the USB and expect to mount the SD Card like you might with a phone or other device. This won’t work, don’t even be trying! It might power the Pi (in a fix, and via the usb-c connection), but there is no other advantage to this. Forget also getting the Pi on the network via ethernet cable from your laptop’s LAN port, remember we don’t even have a bootable OS yet to configure networking of any kind!
Now, once the card is ready, insert it into your Raspberry Pi‘s dedicated slot and apply power to the unit using the official power supply or any phone charger with a usb-c connection.
After a moment, the Pi will either boot to NOOBS and let you select Raspbian installation, or boot to the Raspberry Pi Desktop itself after some initial setup questions.
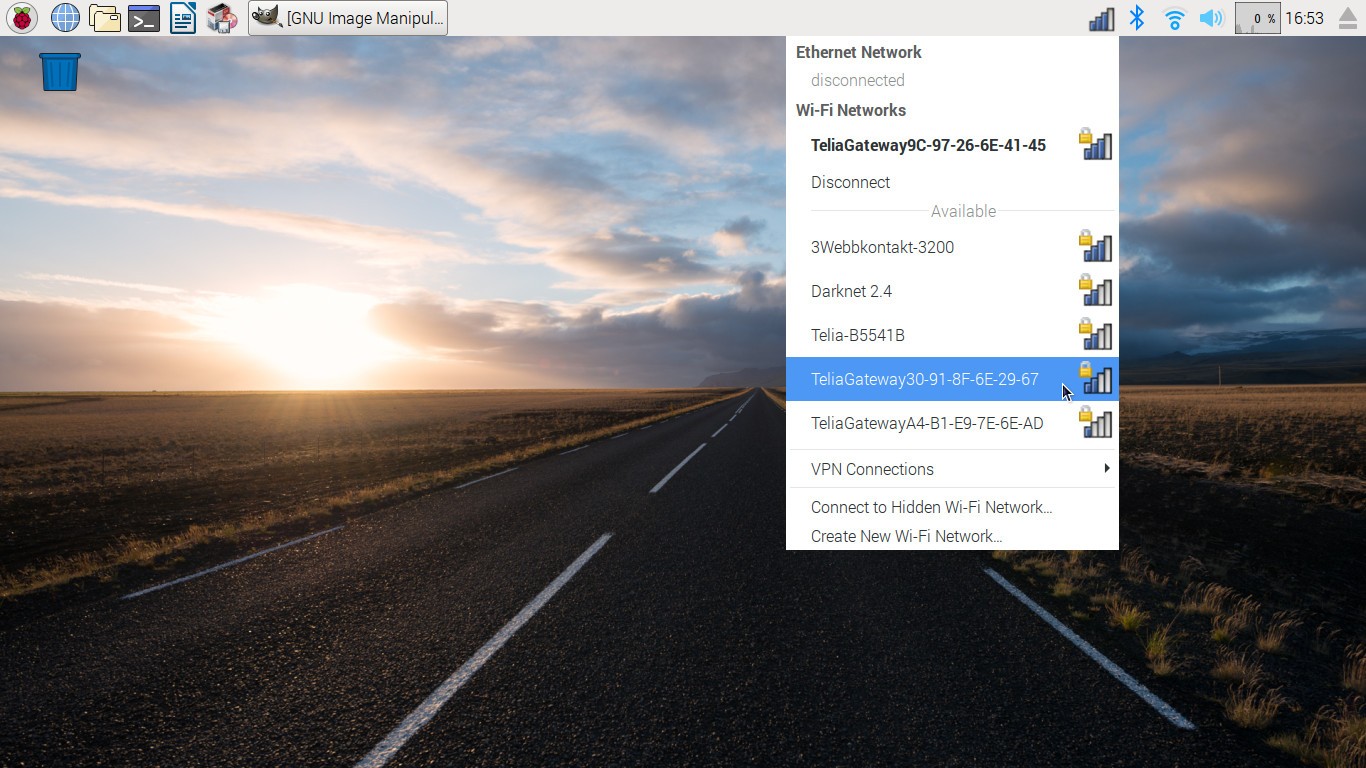
Once fully booted and at the desktop, connect the Raspberry Pi to you local wireless network using the built-in tools (or continue to use the wired ethernet cable, if you connected one earlier).
Getting Started with Mathematica
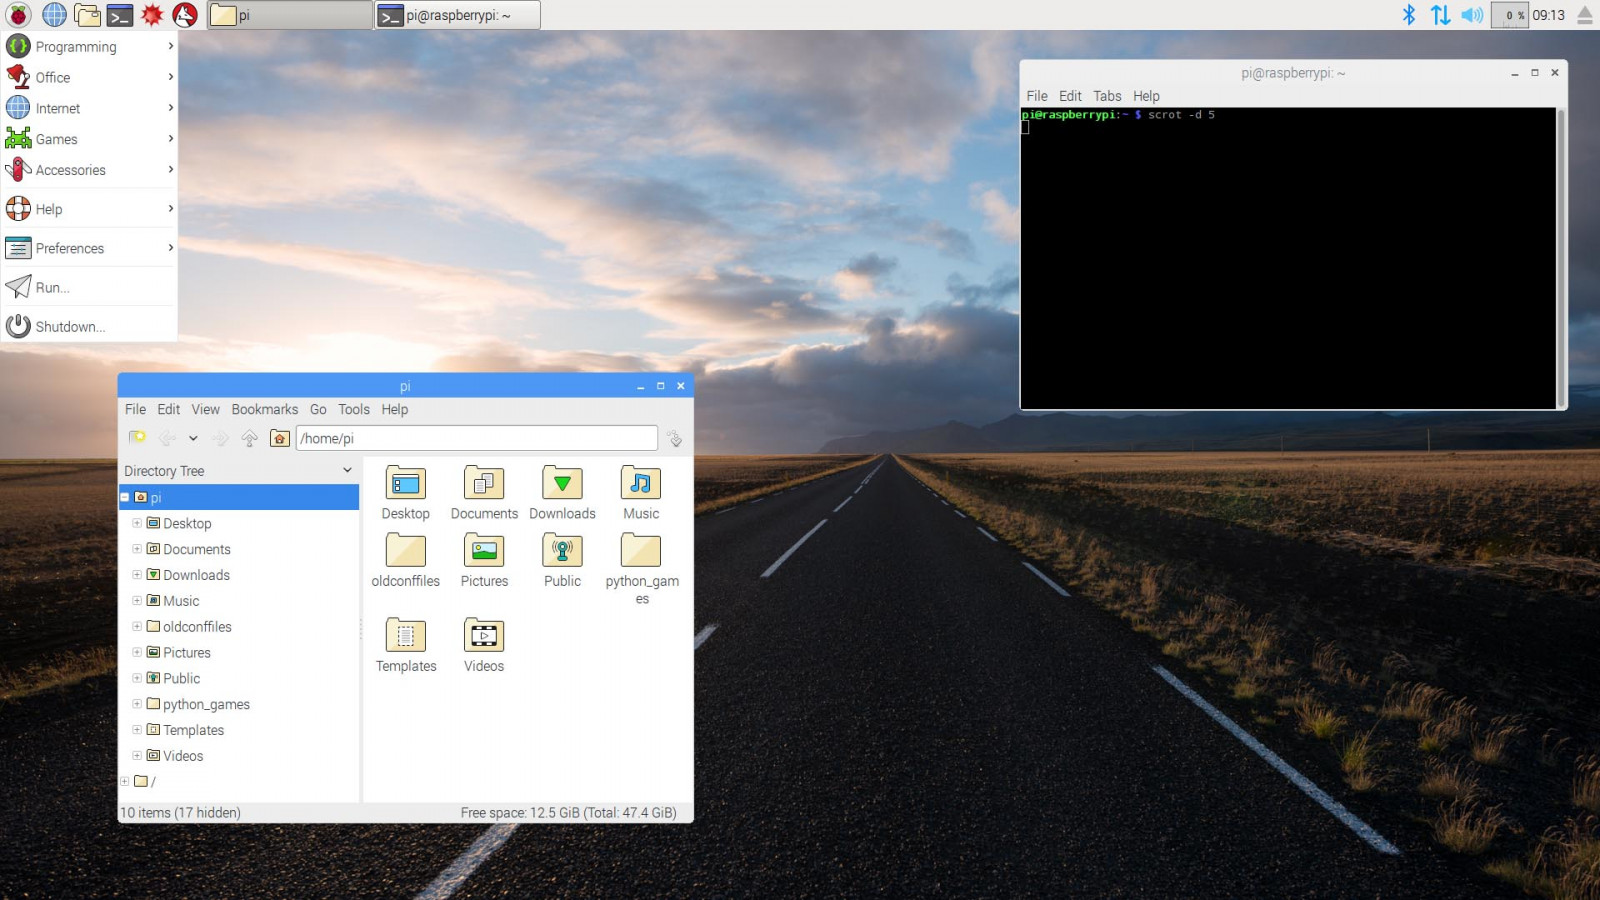
Before we can install Mathematica to our Raspberry Pi, we must first update the package list.
To update the package list all we need to do is run the following command via the Terminal program:
sudo apt update
Updating the package list should allow us to install Mathematica, without any issues.
Now, to install Mathematica, we need to run the command below.
sudo apt install wolfram-engine
This installation process will take some time as the Pi will need to download and install over 500mb of packages.
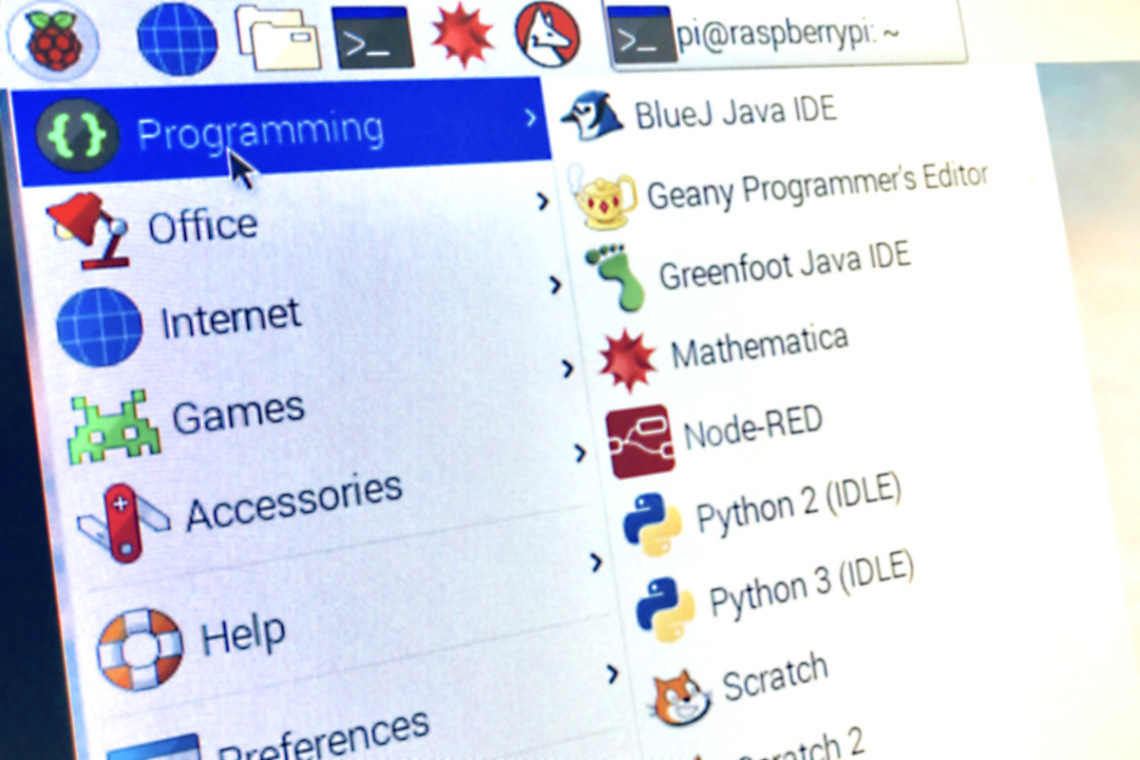
With Mathematica installed to your Pi, we can now launch it from the “Programming” menu.
Congratulations! You can now carry our your Mathematics assignments from home. Don’t forget, you can use your new Pi setup for lots of other at home projects also, even having different SD Cards will different operating systems and packages.. keep an eye on this site for more tutorials in the future.