DHCP Filters are primarily used to further shield an infrastructure by allowing or denying specific clients based on their MAC addresses. Setting up DHCP Filters is quite simple and works at the server level, not at Scope level.
Inside Dundalk Institute of Technology, it is preferred you do not bring up a DHCP server in any of the labs or inside the XenServer Infrastructure as the DkIT network already has a DHCP server and your server will likely offer IP addresses to every machine it can find! This is never good.
However, if you really simply MUST use DHCP (maybe your project explicitly states that you use it) then this is where “DHCP Filtering” comes in.
In a nutshell, with DHCP Filtering, you can filter clients, based on their MAC addresses, in order to either allow them to receive addresses from a DHCP Server or prevent (Deny) that from happening.
Before proceeding with the implementation of DHCP Filters, you will need to know how these filters are applied.
- When the Allow list is enabled, DHCP Server only serves IP addresses to the clients in this list automatically while rejecting all the others. If clients already had an IP address before filtering, then their IP will not automatically renew when Lease expires. This is the preferred method for students.
- When the Deny list is enabled, DHCP Server discards all the clients in this list. If clients already had an IP address and are now in the Deny list, then their Lease will not be renewed once they expire.
- By combining the two, Allow and Deny, the Deny list has precedence. This means that if a client is on the Deny list, it will be prevented in any case even if it is in the Allow list.
Now, let’s see how to configure DHCP filters.
Configure Filters in DHCP Server 2016
Please test the following in VirtualBox or similar to ensure it works before implementing elsewhere. The Windows 2016 ISO file is available here.
In the DHCP console, expand the server and IPv4 objects and go to the Filters object. Here, you’ll see two sub-folders (lists), Allow and Deny. By default, the two lists are deactivated and you can see this from the red down arrow, as shown in the figure below.
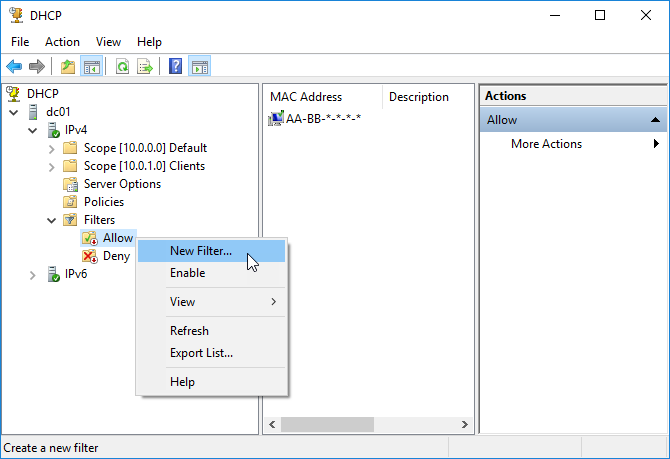
To add a DHCP Client to the Allow list, right-click and then click New Filter. Next, type the client’s MAC address and a description (optional) and click the Add button to complete the process.
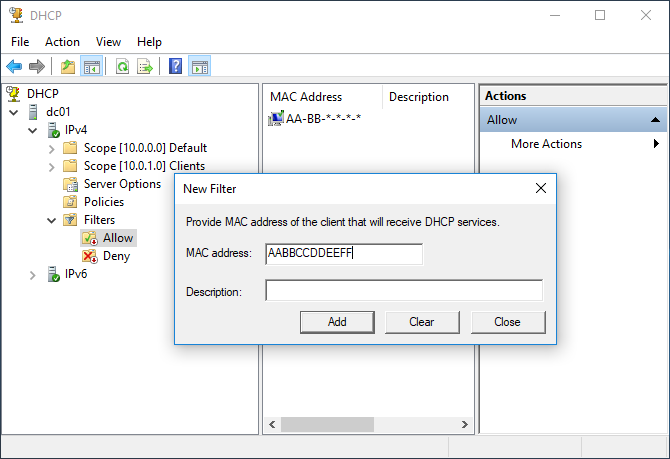
The MAC address you type can be dashed (eg AA-BB-CC-DD-EE-FF) or without (eg AABBCCDDEEFF). You can also use the asterisk (*) as a wildcard to declare a range of MAC addresses. For example, AA-BB-*-DD-EE-FF, AA-BB-CC-*-*-*, AA-BB-*.
Respectively, follow the same procedure to add clients to the Deny list.
What is important to know is that the Deny list is superior to any other setting. So, if a client does not receive an IP address from a DHCP Server and the Filters are enabled, then your first action will be to check if it is in the Deny and then in Allow lists.
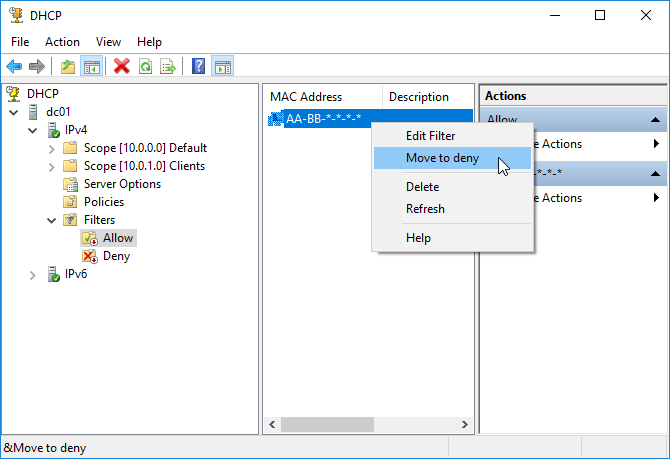
Additionally, you can move one or more clients from one list to another by right-clicking and then choose the corresponding option.
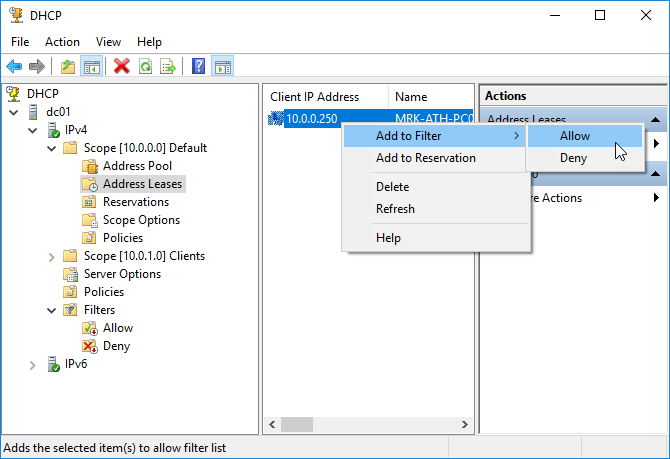
You can do the same for clients already in Address Leases, of course not having to type the MAC address.
Finally, do not forget to enable or disable the Allow and Deny lists by right-clicking and then choosing the corresponding option.
Tip: the command to find the MAC address on your Linux client is ifconfig. The output of this looks like:
eth0 Link encap:Ethernet HWaddr 32:06:36:cc:bb:79
inet addr:10.108.155.15 Bcast:10.108.159.255 Mask:255.255.248.0
inet6 addr: fe80::3006:36ff:fecc:bb79/64 Scope:Link
UP BROADCAST RUNNING MULTICAST MTU:1500 Metric:1
RX packets:1061 errors:0 dropped:0 overruns:0 frame:0
TX packets:144 errors:0 dropped:0 overruns:0 carrier:0
collisions:0 txqueuelen:1000
RX bytes:424684 (424.6 KB) TX bytes:14903 (14.9 KB)
lo Link encap:Local Loopback
inet addr:127.0.0.1 Mask:255.0.0.0
inet6 addr: ::1/128 Scope:Host
UP LOOPBACK RUNNING MTU:65536 Metric:1
RX packets:160 errors:0 dropped:0 overruns:0 frame:0
TX packets:160 errors:0 dropped:0 overruns:0 carrier:0
collisions:0 txqueuelen:1
RX bytes:11840 (11.8 KB) TX bytes:11840 (11.8 KB)
The MAC address 32:06:36:cc:bb:79, for example, would be whitelisted as 320636ccbb79 or 32-06-36-cc-bb-79. Use the full MAC address, not wildcards (*) for your whitelists.